Theme Documentation
Introduction
Thank you for purchasing Nouthemes. Before you get started, please be sure to always check out these documentation files. We outline all kinds of good information, and provide you with all the details you need know to use bready Shop.
If you are unable to find your answer here in the documentation, please contact us on our Support Page or directly from our themeforest account
What is included in the price?
- Bready - Cake Bakery Food WordPress Theme
- Child Theme
- Lifetime Updates
- Theme Documentation
- Premium Plugins
- Premium Plugins documentations
- Premium Support - To our support Page.
Please don't forget to rate bready with 5 stars and leave a nice review, it means a lot to us.
Simply log in into your Themeforest, go to Downloads section and click 5 stars next to the bready WordPress theme.
Thanks!
Nouthemes
Theme Installation via WordPress
When you download the theme from Themeforest, you will get an archive file in .zip extension.
You need to unzip that archive. When done, you should see bready.zip (zip file name can be changed from version to version).
Please, follow the steps below to install bready Shop.
Step 1 - Login to your WordPress Dasrdoard.
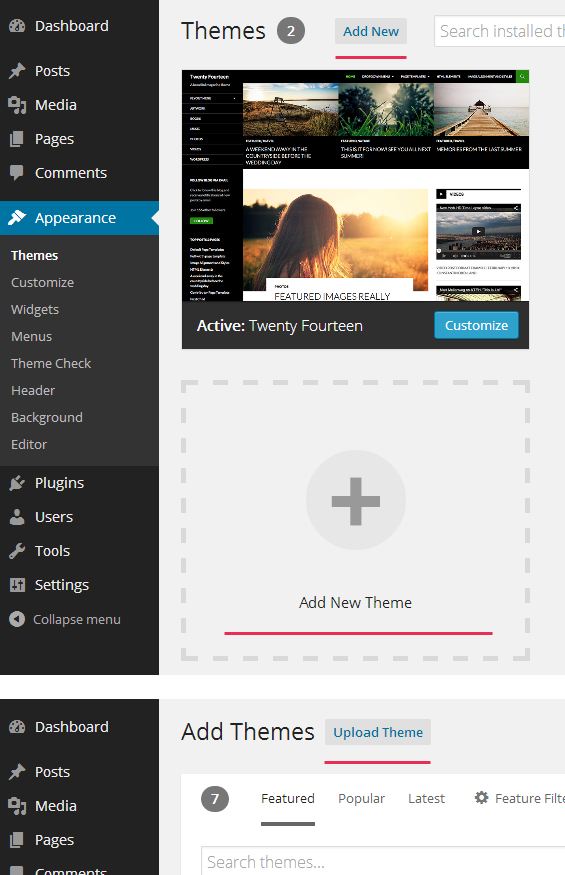
Step 2 - Go to Appearance > Themes. Click Add new button, located at the top of the screen or Add new theme ( see screenshots below ).
Step 3 - Click on Upload button at the top of the screen.
Step 4 - Choose bready.zip.
Step 5 - Wait while the theme is uploaded and installed then activate the theme.
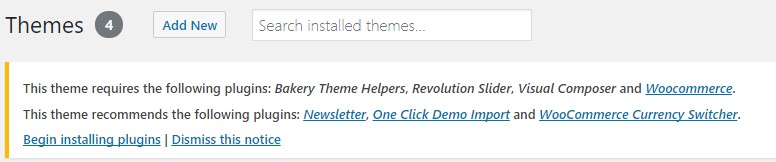
Step 6 - After activating the theme a notice should appear on the top of the screen, click on begin installing plugins ( see screenshots below ).
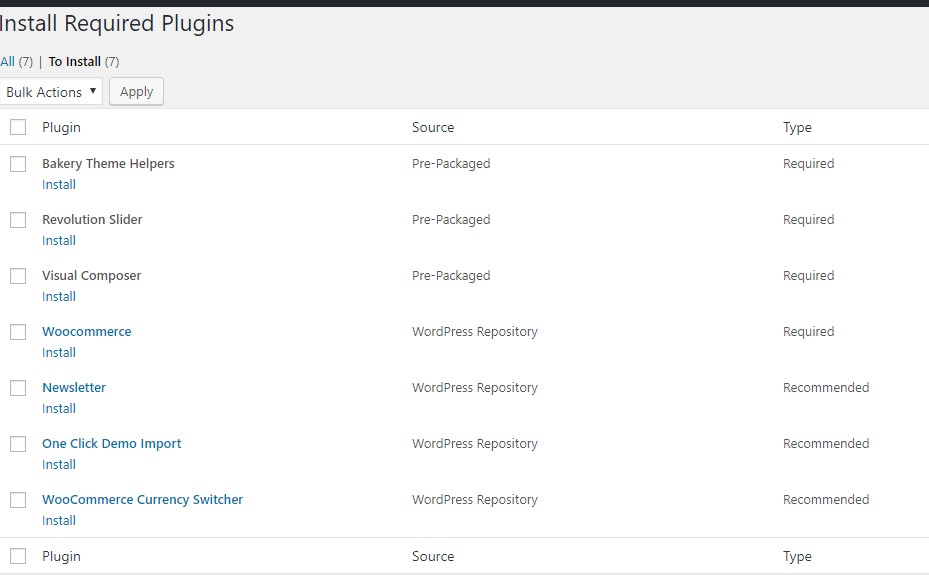
Step 7 - Select all the plugin,change Bulk Actions drop to Install then click apply ( see screenshots below ).
Step 8 - Congratulation you are ready to use bready, check the First Steps part of our documentation to see what you may want to do before starting to edit your WordPress Site.
Common Theme Installation Problems
"Are you sure you want to do this?"
If you get the "Are you sure you want to do this" message when installing bready.zip file via WordPress, it means you have an upload file size limit. Install the theme via FTP if this happens, or ask your hosting company to increase the limit.
Missing stylesheet file
If you get an error saying that the stylesheet is missing, then you have uploaded the wrong folder. Please check that you are uploading the bready.zip within the Theme Files folder. You have to unzip the file that you download from Themeforest to find this.
Theme Installation via FTP
If you are going to install the theme using FTP, you will need an FTP Client, such as FileZilla.
When you download the theme from Themeforest, you will get an archive file in .zip extension.
You need to unzip that archive. When done, you should see bready Folder(folder name can be changed from version to version).
Please, follow the steps below to install the theme via FTP:
Step 1 - Log into your hosting space (server) via FTP client.
Step 2 - In extracted archive folder, find bready folder
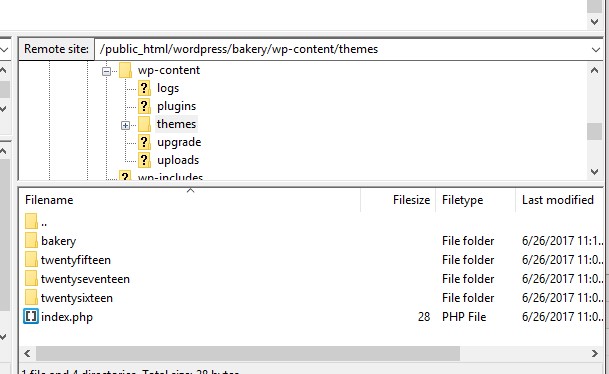
Step 3 - Upload the bready folder to your server in path .../wp-content/themes/.
Step 4 - The uploaded path should be like this: .../wp-content/themes/bready/
Step 5 - Login to your WordPress Dasrdoard and go to Appearance > Themes and activate the bready Theme.
Step 6 - After activating the theme a notice should appear on the top of the screen, click on begin installing plugins ( see screenshots below ).
Step 7 - Select all the plugin,change Bulk Actions drop to Install then click apply ( see screenshots below ).
Step 8 - Congratulation you are ready to use bready, check the First Steps part of our documentation to see what you may want to do before starting to edit your WordPress Site.
Additional Links
Setting up the Demo Content
Before importing the dummy data Make sure you have all the plugin installed ( if you want to use woocommerce, make sure to install woocomerce first ).
One Click Importer
We will explain how to import the demo usign the Theme One Click Importer
WordPress Importer
We will explain how to import the demo usign the WordPress Importer
Error or Problem with Import of the Demo
If you have problem with the Import of the demo please check this section
One Click Importer
Step 1 - Log into your WordPress Dasrdoard.
Step 2 - Go to Appearance > Demo Importer.
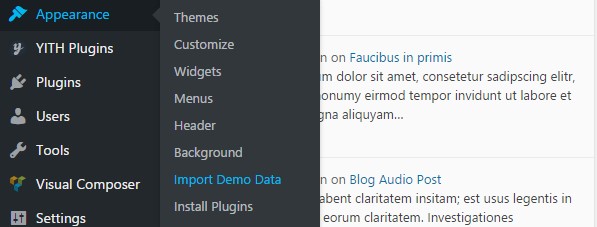
Step 3 - Then Click on Import Demo.
Step 4 - The Dummy content is really big and may takes more then 30 minutes to import depending where you are living, Do not interrupt/cancel the import process!
Step 6 - Done! But you still need to set the Menu, Widget, Homepage.
WordPress Importer
Step 1 - Log into your WordPress Dasrdoard.
Step 2 - Go to Tools > Import. Then click on WordPress ( bottom of the list ).
Step 3 - A window should appear click the Install now button which is on bottom right.
Step 4 - Click Activate plugin & Run Importer. Then choose the bready_demo.xml file and click upload file and import Do not interrupt/cancel the import process!
Step 6 - Done! But you still need to set the Menu, Widget, Homepage.

The importer should be run only once. If something went wrong and you need to import the content again, you may need to reset your WordPress.
Use this plugin to reset the WordPress database : http://wordpress.org/plugins/wordpress-database-reset/
Error or Problem with Import of the Demo
If you have problems importing the demo ( example : infinite loading, error 505 with when using wordpress importer ) then you may have a problem with the server settings. Please check this article : What To Do If Demo Content Import Fails.
Upload your logo
You can upload your logo image in the Theme Options. If the logo is not uploaded, then your site name will be used.
Please, follow the steps below to upload your logo:
Step 1 - Login to your WordPress Dasrdoard.
Step 2 - Go to Appearance > Customize > General.
Step 3 - Upload a Upload logo for header . We recommend logo image in .PNG file format for all logo images..
Step 4 - Show Loading Page
Change Notifycation
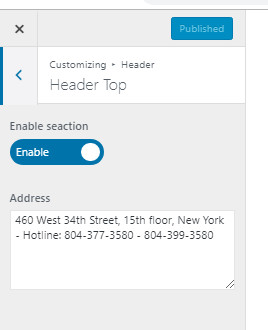
Step 1 - Login to your WordPress Dasrdoard.
Step 2 - Go to Appearance > Customize > Header > Header Top.
Step 3 - Show Loading Page
Change Theme Layout / Color
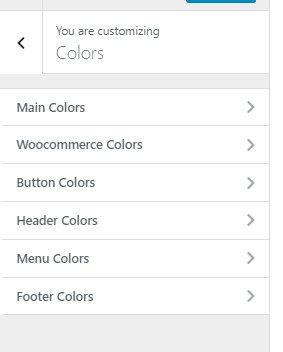
You can set unique color for every part of the theme, the option are separate in seven section.
Follow the steps below to find out how to change the theme color and design:
Step 1 - Login to your WordPress Dasrdoard.
Step 2 - Click on Appearance > Customize
Step 3 - Choose which part of the theme you want to modify
Menu Setup
Creating your menu
First we will see how to create your menu
Adding pages to your menu
How to add page to our new menu
Assigning a Menu to a Location
Select where to show our menu
Menu
Learn how to make an awesome menu
Creating your menu
Step 1 - Login to the WordPress Dasrdoard.
Step 2 - From the 'Appearance' menu on the left-hand side of the Dasrdoard, select the 'Menus' option to bring up the Menu Editor.
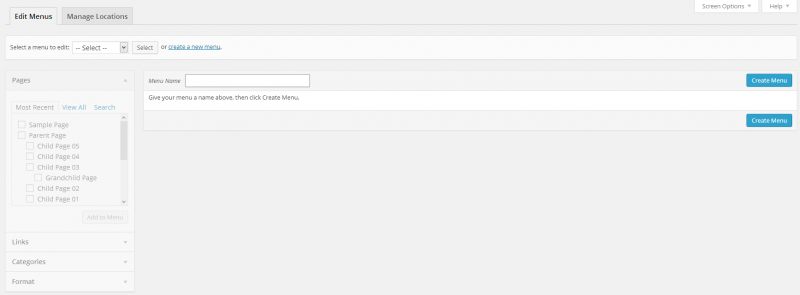
Step 3 - Select Create a new menu at the top of the page.
Step 4 - Enter a name for your new menu in the Menu Name box.
Step 5 - Click the Create Menu button.
Your menu is now defined, and you can now add pages to it (steps below).
Adding pages to your menu
The Screen Options allow you to choose which items you can use to add to a menu. Certain items, like Posts are hidden by default. The Screen Options are located in the top right corner of your WordPress Dasrdoard.
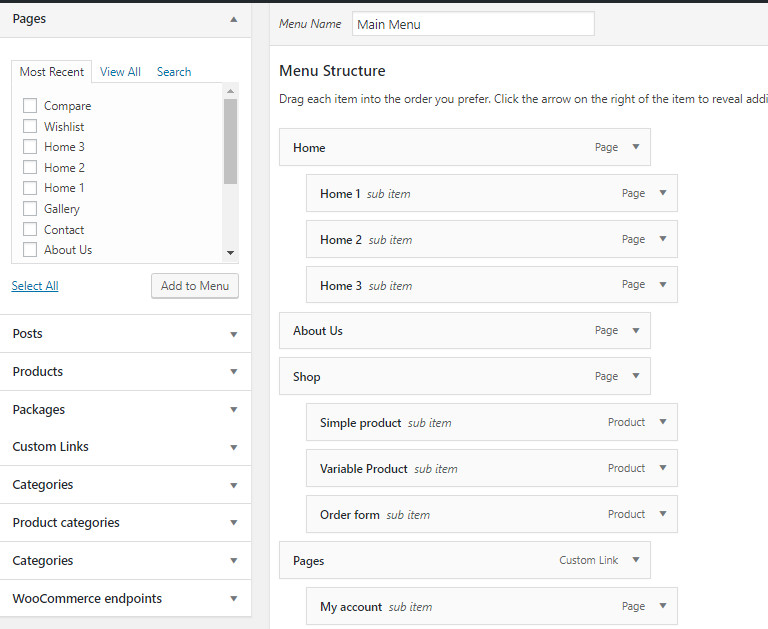
Step 1 - Locate the pane entitled Pages.
Step 2 - Within this pane, select the View All link to bring up a list of all the currently published Pages on your site.
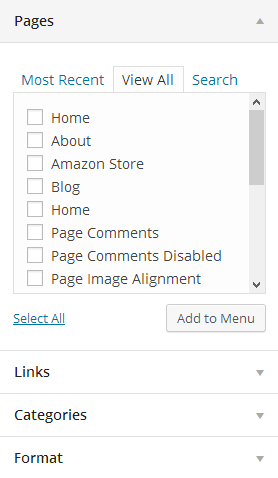
Step 3 - Select the Pages that you want to add by clicking the checkbox next to each Page's title.
Step 4 - Click the Add to Menu button located at the bottom of this pane to add your selection(s) to the menu that you created in the previous step.
Step 5 - Click the Save Menu button once you've added all the menu items you want.
Your custom menu has now been saved.
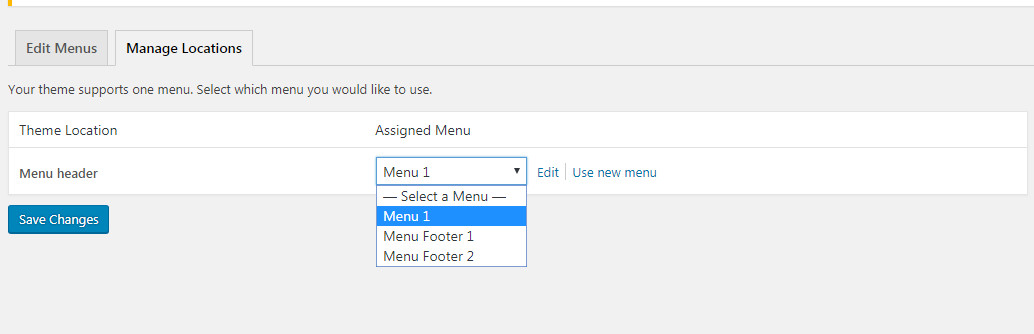
Assigning a Menu to a Location
Once you've created a menu and filled it with items, it's time to assign it to one of the theme pre-defined locations.
Step 1 - Go to Appearance > Menus and click Manage Locations.
Step 2 - Assign each Theme Location with a menu. You can assign menus to multiple Theme Locations.
Step 3 - Click the Save Changes button.
Menu
bready Menus.Follow the steps below to create a menu:
Step 1 - Add a an item to the menu editor. This has to be a top level item!
Step 2 - Click on arrow icon in the top right-hand and expand.
Step 3 - Now, you need to add child menu items, like on the image below.
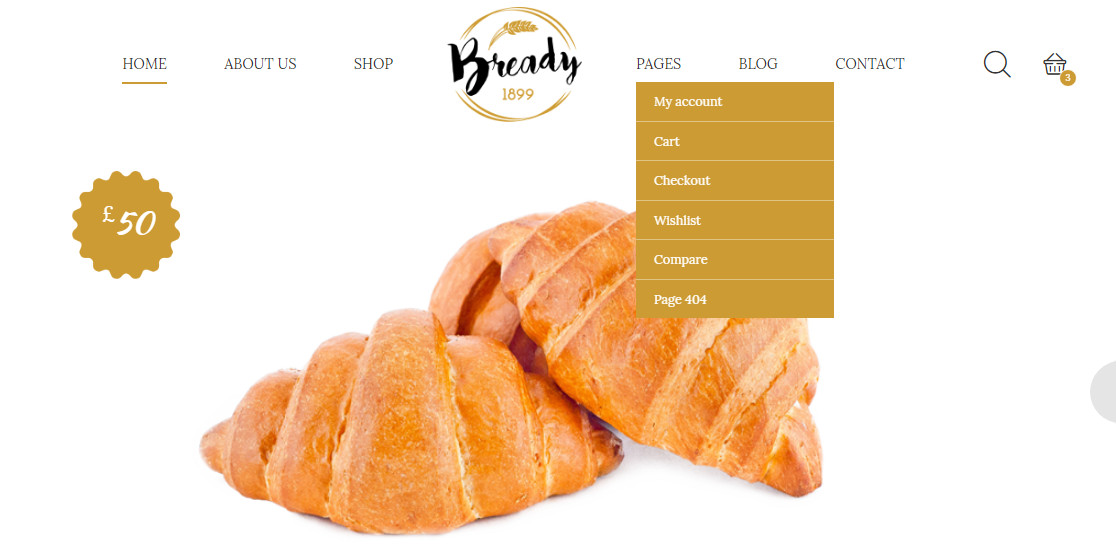
The menu dropdown should now look something like this :
Create Blog Posts
Adding Posts
You can customize each posts modifying the post options.
We will explain you how to create post using bready.
Gallery Posts
We will explain you how to create Gallery Post.
Video Posts
We will explain you how to create Video Post.
Audio Posts
We will explain you how to create Audio Post.
Quote Posts
We will explain you how to create Quote Post.
Post Options
Explain the Post Options
Show your Posts
How to create a Blog page to show your post
Adding Posts
Step 1 - Log in to your WordPress Administration Panel (Dasrdoard)..
Step 2 - Click the 'Posts' tab.
Step 3 - Click the 'Add New' sub-tab.
Step 4 - Start filling in the blanks: enter your post title in the upper field, and enter your post body content in the main post editing box below it.
Step 5 - As needed, select a category, add tags, post format, fill in the meta setings below the editor.
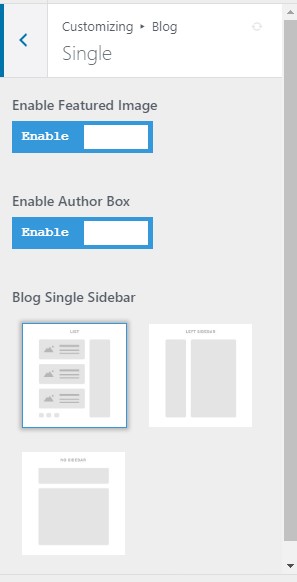
Step 6 - Upload a featured image for your Post.
Step 7 - Scroll down until you see the Post options box, there you will be able to customize the post. Please check Post options page for more information.
Read More - To make the post appear with a "read more" link you need to use the Read more tag button . 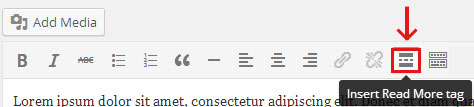
Create Gallery Post
Step 1 - Change Post Format to Gallery. 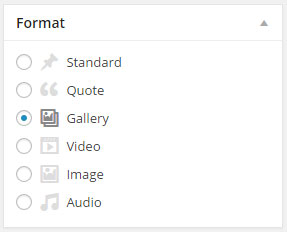
Step 2 - Scroll down until you see the Featured Gallery then click select images. 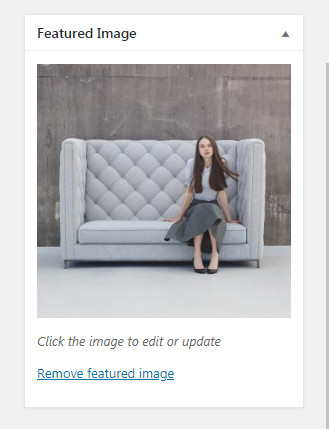
Step 3 - Upload or Select the image you want to use by using Ctrl + Click then click Create new gallery. 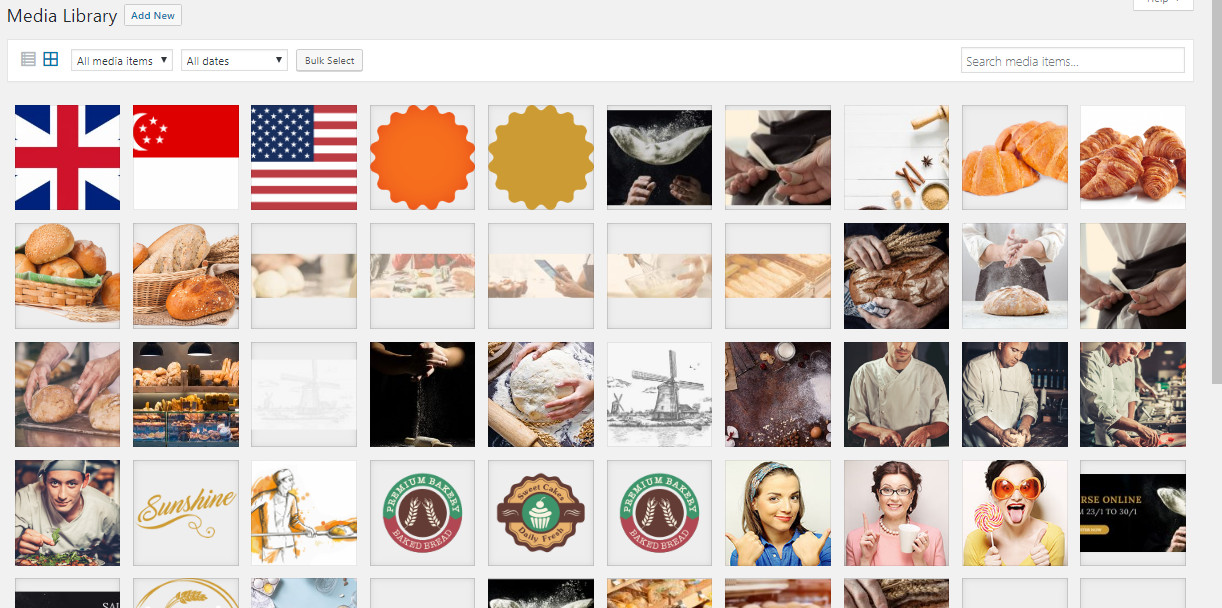
Step 4 - When you are finished, Update your Post, it should looks like this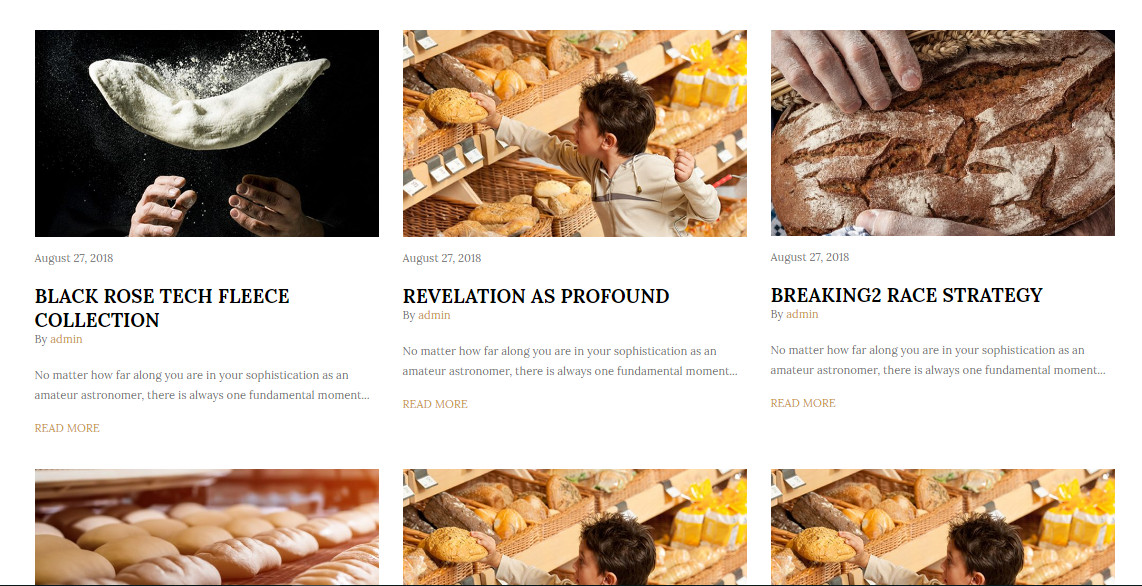
Video Post
Step 1 - Change Post Format to Video. 
Step 2 - Scroll down until you see the Post options Video Embed Code then past your Vimeo or Youtube embed code. 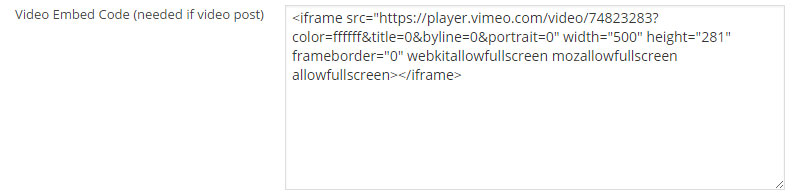
Step 3 - When you are finished, Update your Post, it should looks like this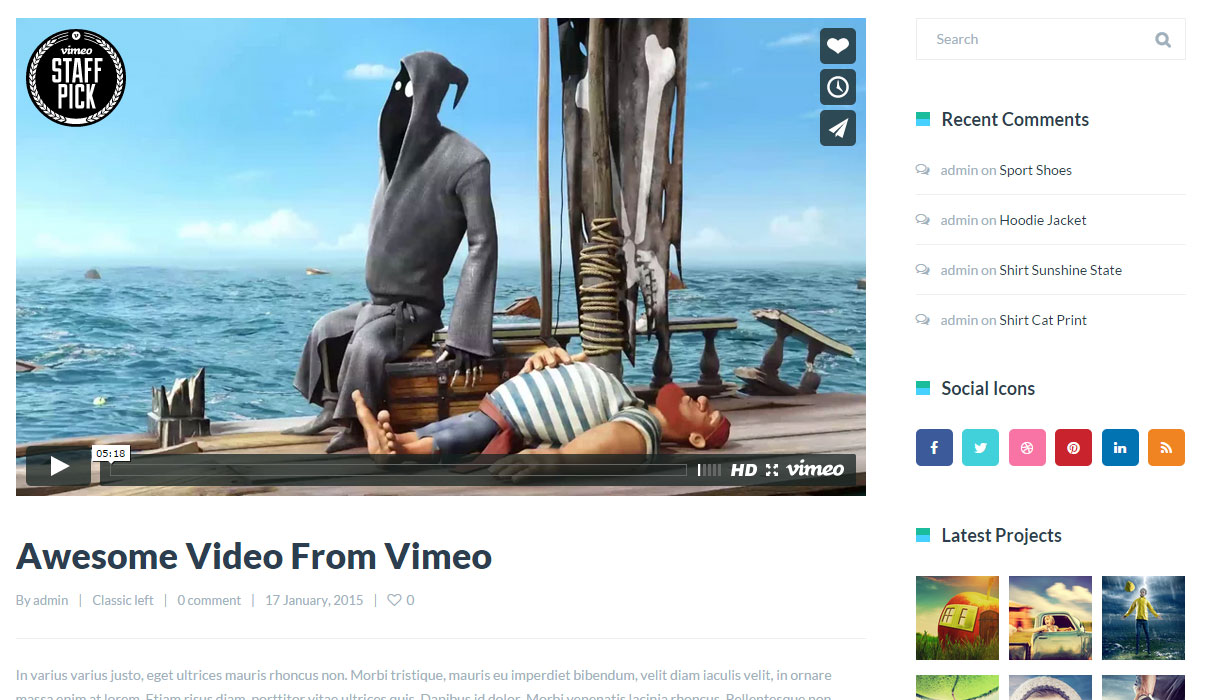
Audio Post
Step 1 - Change Post Format to Audio. 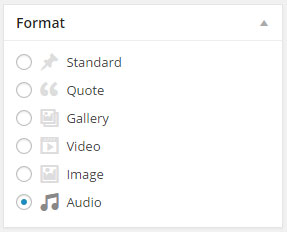
Step 2 - Now you need to add an audio file to your post, the audio file needs to be inserted before any content
Step 3 - Click Add Media and upload your audio file or select from your file, then click insert into post. Your post should look like this 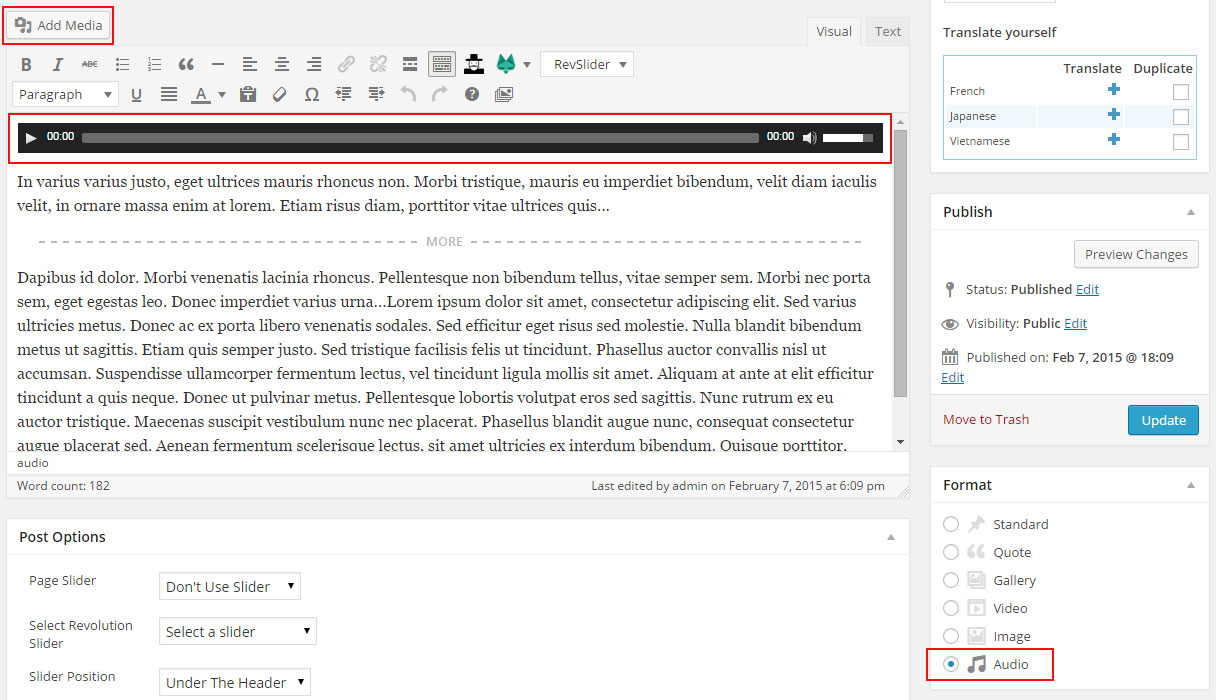
Step 4 - Publish or Update your post, it should looks like this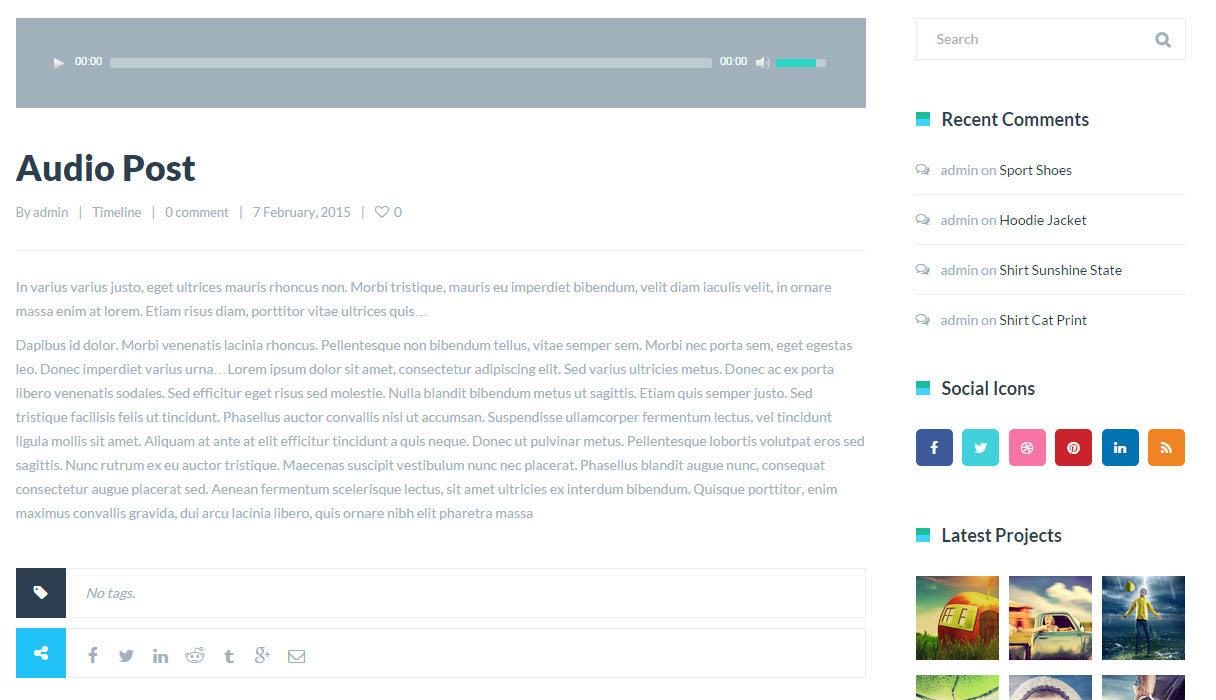
Quote Post
Step 1 - Change Post Format to Quote. 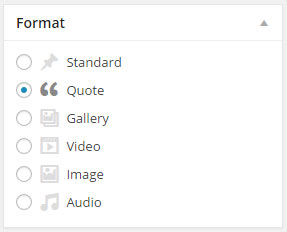
Step 2 - Scroll down until you see the Post options Quote Text, Quote Author name then write your Quote text and Quote author name.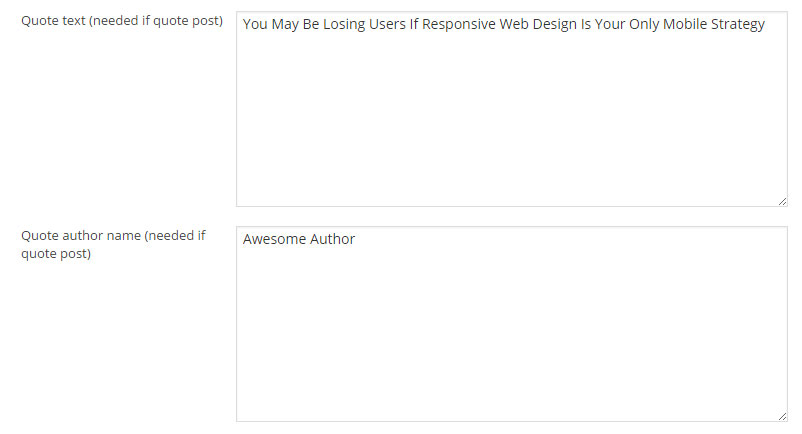
Step 3 - When you are finished, Update your Post, it should looks like this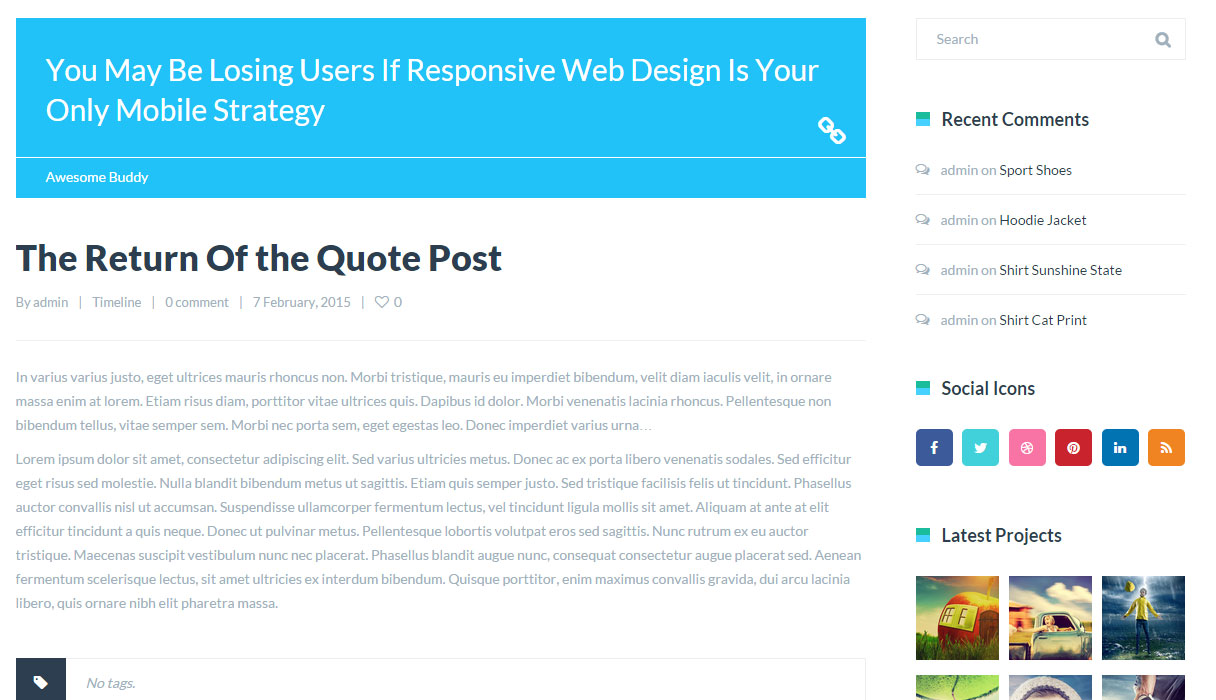
Post Options
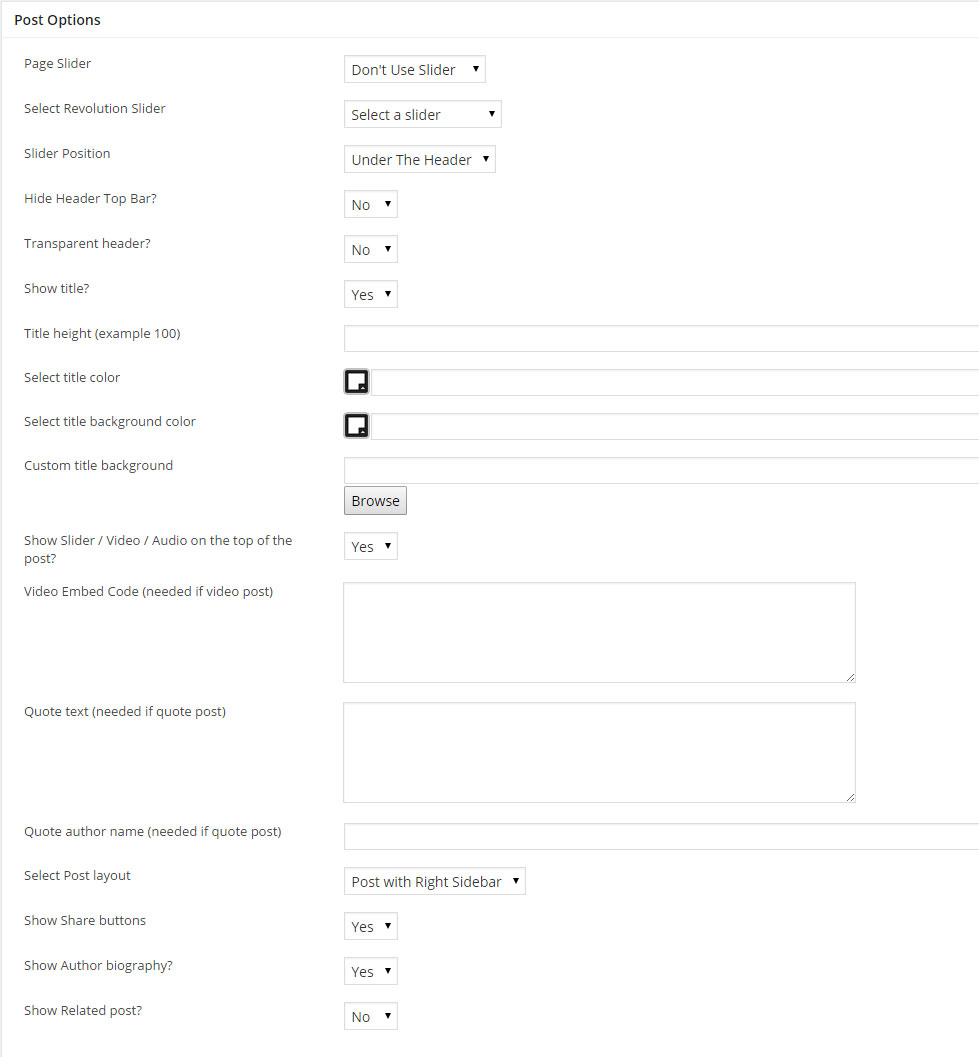 Page Slider - You can use a Revolution or Layer Slider top show on the Post page
Select Revolution / Layer Slider - Select the Slider you want to use for the post
Slider Position - Select if the Slider should be above or under the header
Hide Header top bar - Select if you want to hide the header top bar for this post
Transparent Header - Select if you want to use a Transparent Header for this post
Show title - Select if you want to show or hide the post title section
Title Color - If you want to change the title text color
Title Background Color - If you want to change the title background color
Custom Title Background - If you want to use an image for the title background, you can upload an image or use an image link
Show Slider / Video / Audio on the top of the post - Select if you want to show or hide the featured image / gallery / video / audio / quote on the top of the post
Show Breadcrumbs - Select if you want to hide or show the breadcrumbs
Video Embed Code - Fill this field to make the video appear on top of your post
Quote text - Fill this field to make the quote text appear on top of your post
Quote author name - Fill this field to make the quote author name to appear on top of your post
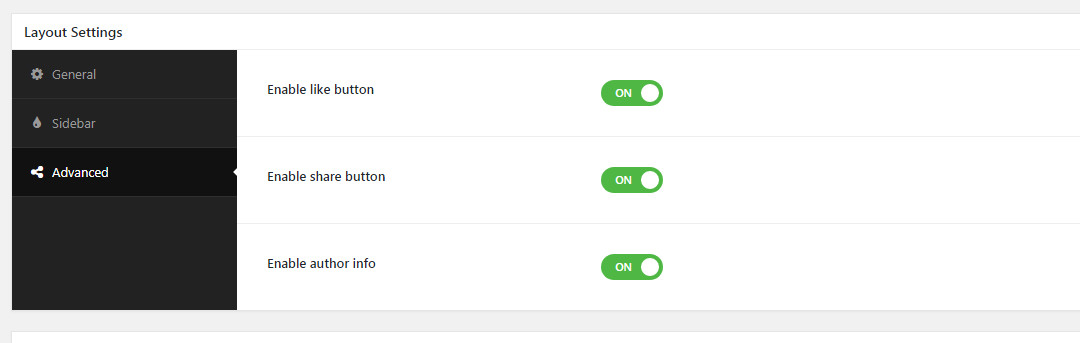
Select Post Layout - Select the post Layout. Post with Right, Left or No Sidebar
Show Share Buttons - Select if you want to show or hide the share button 
Show Author Biography - Select if you want to show or hide the Author Biography 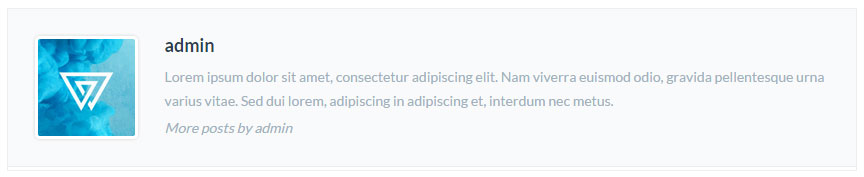
Show Related Post - Select if you want to show or hide the Related post carousel
Show your Posts
To you show your posts you need to create a Blog page. Click here to check how create a blog page.
Create Blog page
Create Blog page
Follow the steps bellow to understand how to create a blog page.
Blog settings
Explain the Blog module settings.
Create blog page
Step 1 - Log in to your WordPress Administration Panel (Dasrdoard)..
Step 2 - Click on Pages > Add New.
Step 3 - Give your page a name then Change the Editor to Backend Editor ( you need to have the Visual Composer plugin activated ).
Step 4 - Click on the Add Element button 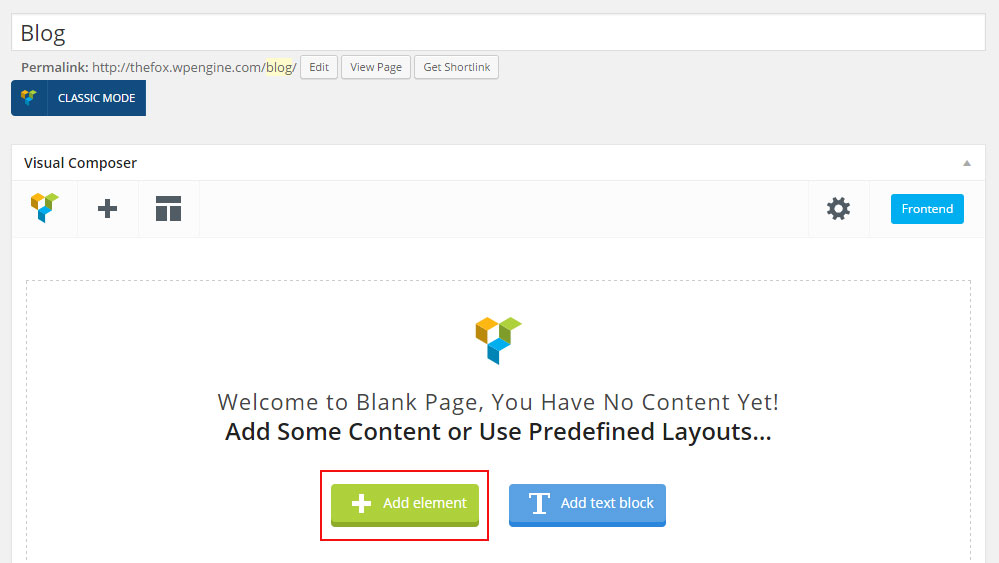 .
.
Step 5 - Select the Blog module.
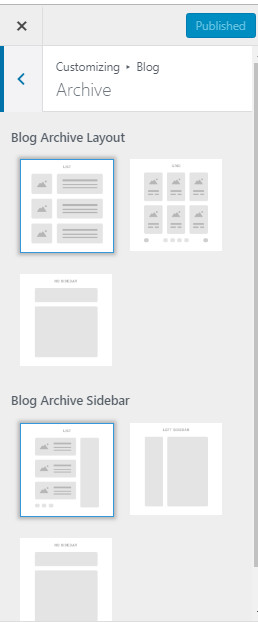
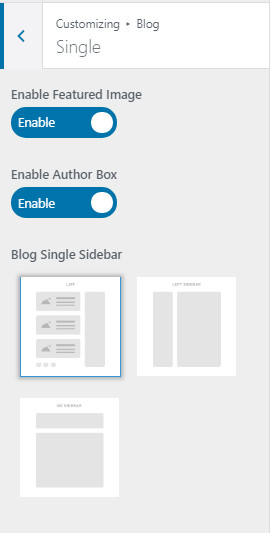
Step 6 - The Blog Settings should appear. You can customize the blog type and color by modifying the settings
Step 7 - You can change the Page layout ( page with left or right sidebar ) from the page options, scroll down until you see the page options change the Page layout then publish the page
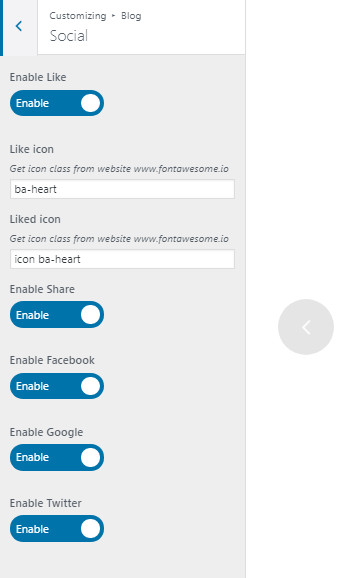
Blog settings
Post per page - Set the number of post you want to show on the page.
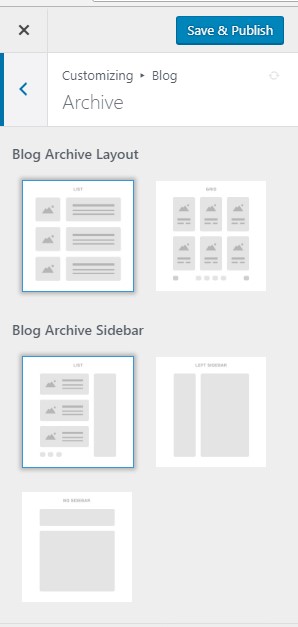
Blog Type - You can choose between 5 style: Standard, Grid, Masonry, Timeline, Multi Author. It will change the blog main design.
Thumbnail size - For Standard, Timeline, Multi Author you can choose between croped Thumbnail or Full size ( original size thumbnail ).
Number of Columns - For Grid and Masonry you can change the blog layout between 4, 3, 2 columns layout.
Category - You can filter the blog using category, select the category you want to show.
Color - Leave blank to use Color you set in theme options, but you can customize each color for the heading, text, highlight, hover, border, background.
Navigation Type - Select the navigation to use. Load More Button or Classic Navigation
Navigation Color - You can also customize the Navigation color if needed.
Create Contact Form
Create Contact Form
bready use the contact form 7 plugin, check the steps below to see how to create the contact form.
Create Contact Page
We will explain how to use the form you just created in your page or post.
Contact Form 7 Documentation
Link to the Official Documentation of the Plugin.
Create Contact Form
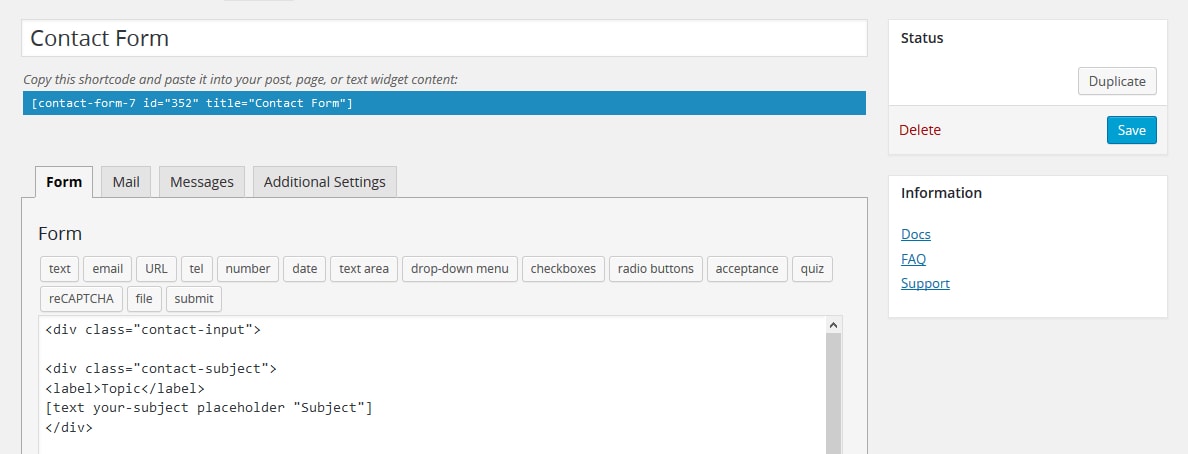
Use this plugin to make the contact form on contact page. Navigate to Contact - Contact Forms, there is a form named Contact form, if you want to create a new form, click on Add New button.
Click on the form title to edit form, copy this code and paste into Form box:
| <div class="contact-input"> | |
| <div class="contact-subject"> | |
| <label>Topic</label> | |
| [text your-subject placeholder "Subject"] | |
| </div> | |
| <div class="contact-info"> | |
| <div class="contact-name"> | |
| <label>Name</label> | |
| [text* your-name placeholder "Name (required)"] | |
| </div> | |
| <div class="contact-email"> | |
| <label>E-mail</label> | |
| [email* your-email placeholder "Email (required)"] | |
| </div> | |
| </div> | |
| <div class="contact-message"> | |
| <label>Message</label> | |
| [textarea your-message placeholder "Message"] | |
| </div> | |
| <div class="contact-submit">[submit class:button "Submit Form"]</div> | |
| </div> |
woocommerce Post Options
For each woocommerce post you can change the Columns, left sidebar, right sidebar, no sidebar, select to use a slider and much more! Check the screenshot and read the documentation to see how it works
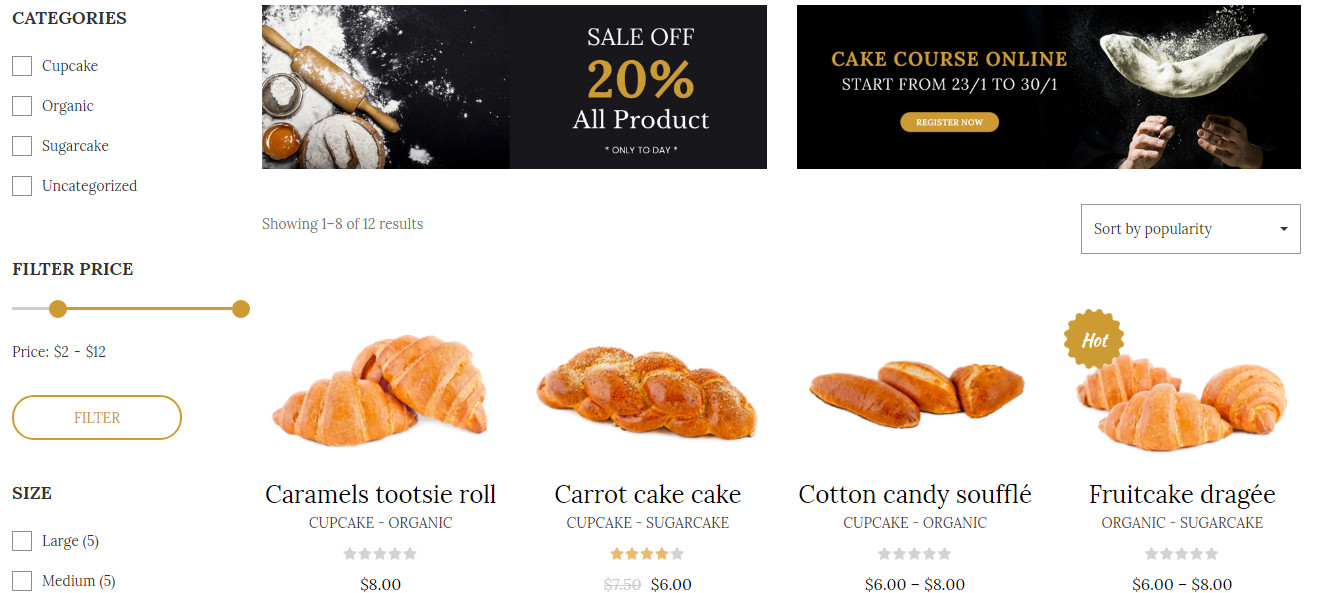
woocommerce Columns - easily adjusted to increase or decrease the number of columns
Projects per page - easily adjusted to increase or decrease the number of projects on page

Page Builder
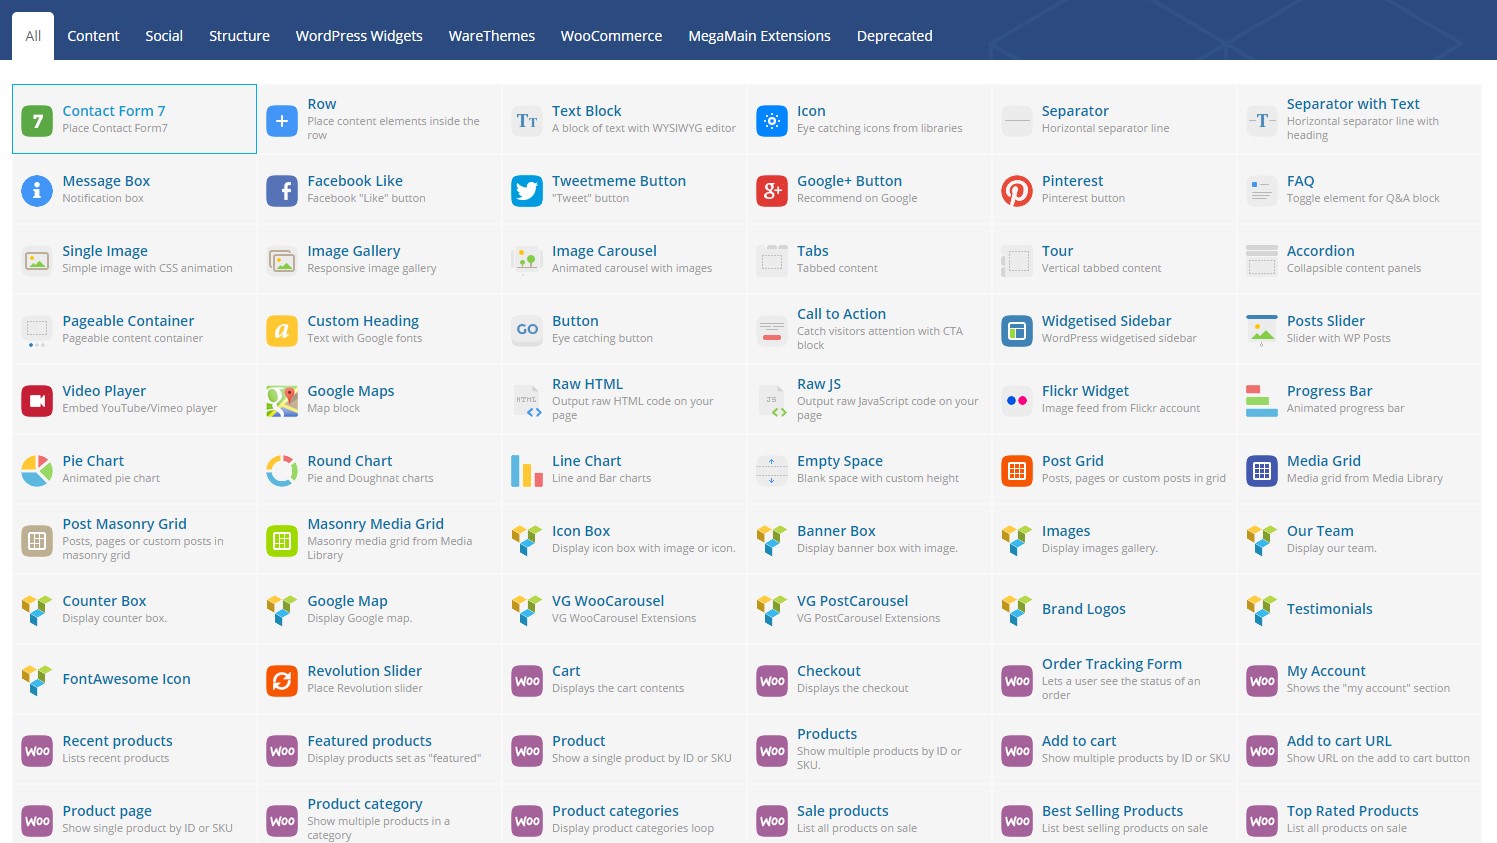
bready comes with the Premium Plugin Visual Composer, we modified the plugin and added module to give the user the possibility to create all the page and post using only the Visual Composer, no code needed.
We have 75 Modules ( include WooCommerce, Revolution Slider ).
To learn how to use the page builder check How to Use Page builder Section
To see all Module Detailed Settings check Page builder Modules
Shortcode Manager
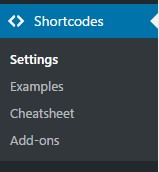
bready theme includes the plugin - Shortcodes Ultimate.
Once you've installed and activated the Revolution Slider plugin, you will then see the menu item appear at the bottom of the WordPress menu, as below:
Documentation
You can used Shortcodes Ultimate, To learn more about the Shortcodes Ultimate plugin please read the Plugin documentation
Revolution Slider
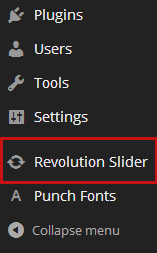
bready theme includes the premium plugin - Revolution Slider.
Once you've installed and activated the Revolution Slider plugin, you will then see the menu item appear at the bottom of the WordPress menu, as below:
Documentation
You can import the revolution slider we used in our demo, all slider are in the slider folder. To learn more about the Revolution Slider plugin please read the Plugin documentation
Features
Widgets
bready theme comes with Custom widget created specially for the theme.
To set the Widget go to Appearance > Widgets.
Included Widgets:
- Partners Carousel
- Recent Post Carousel
- Sidebar, Footer Recent Posts Widget
- Custom Google map
Additional Links:
Use Page Builder
Activate Page builder
We will explain how to active the Visual Composer.
Add and modify Row Layout
We will explain how to add Row and change Row layout works.
Edit Element
We will explain how to edit element.
Duplicate Element
We will explain how to duplicate element.
Remove Element
We will explain how to remove element.
About Row / Column / Custom heading / Text Block Design options
We will explain how to edit design options to make your page looks beautiful.
Official Plugin Documentation
For More information about the Visual Composer check the official documentation.
Activate Page builder
Step 1 - Log in to your WordPress Administration Panel.
Step 2 - Click on Pages > Add New.
Step 3 - Click on Backend Editor.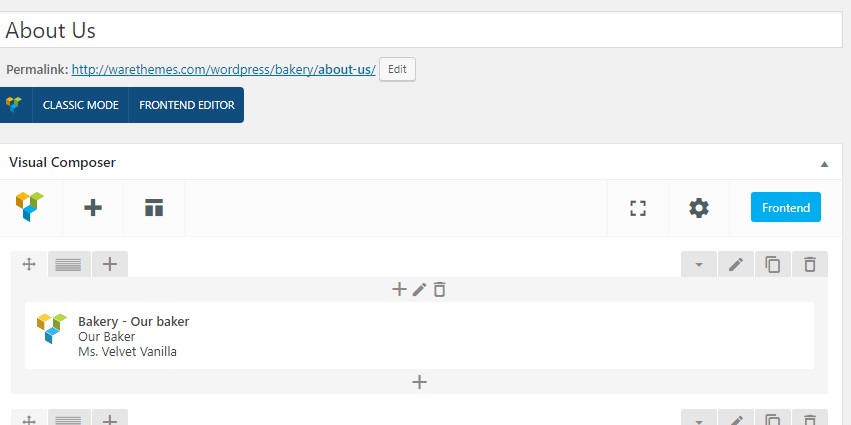
Add and modify Row Layout
Step 1 - Go to your page / post, first activate the backend editor and click Add Element 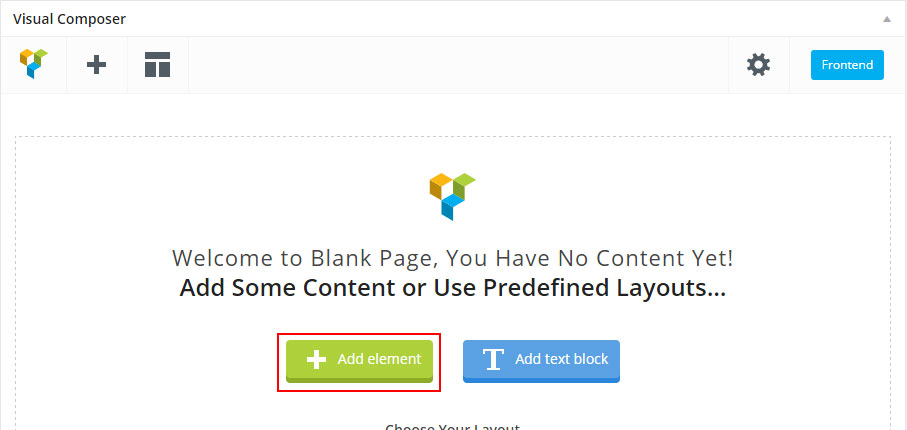
Step 2 - Select the Row Module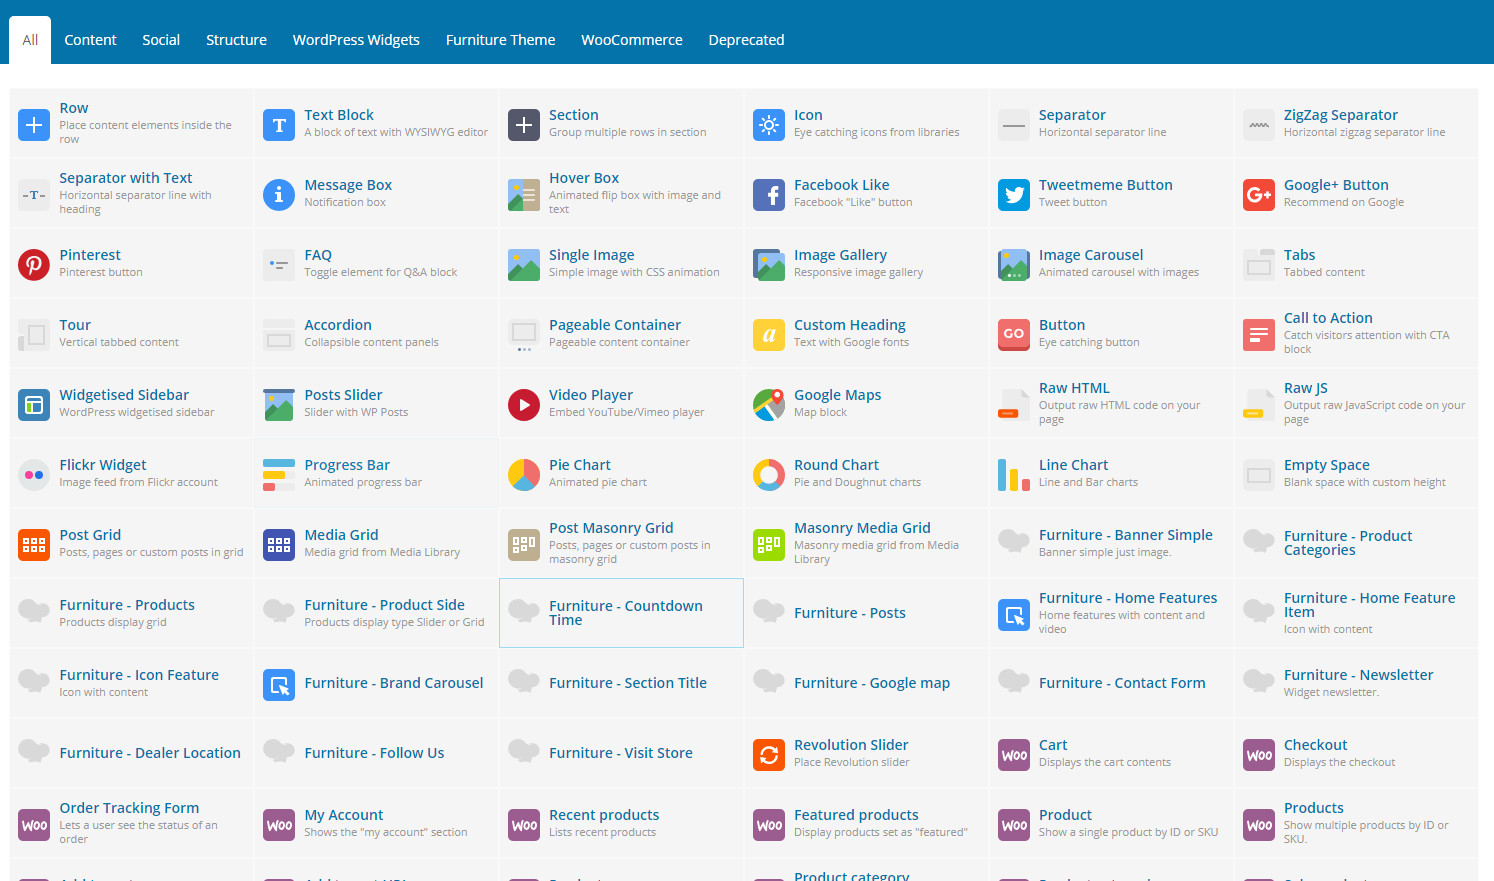
Step 3 - Click on the Edit This Row (pencil icon) to Edit the Row element ( in our example we use row with 3 columns filled with text block )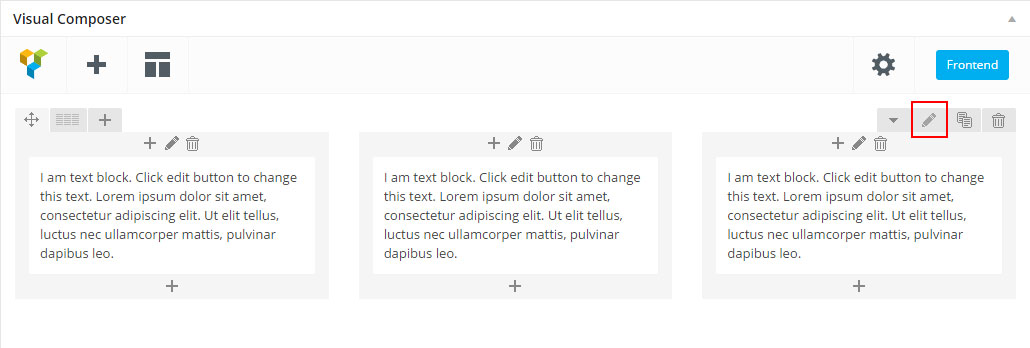
Step 4 - To change the Row layout ( number of columns ) you need to click the second Icon from the left then select a layout or custom to make your own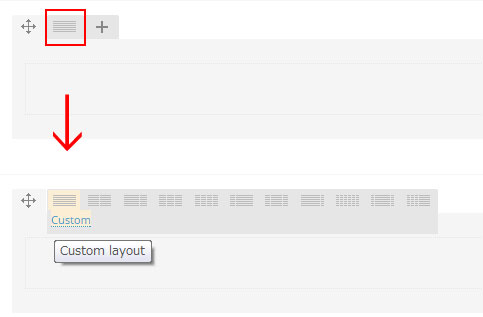
Edit Element
Pencil Icon - To Edit Row, Column or Module you need to click the Pencil icon.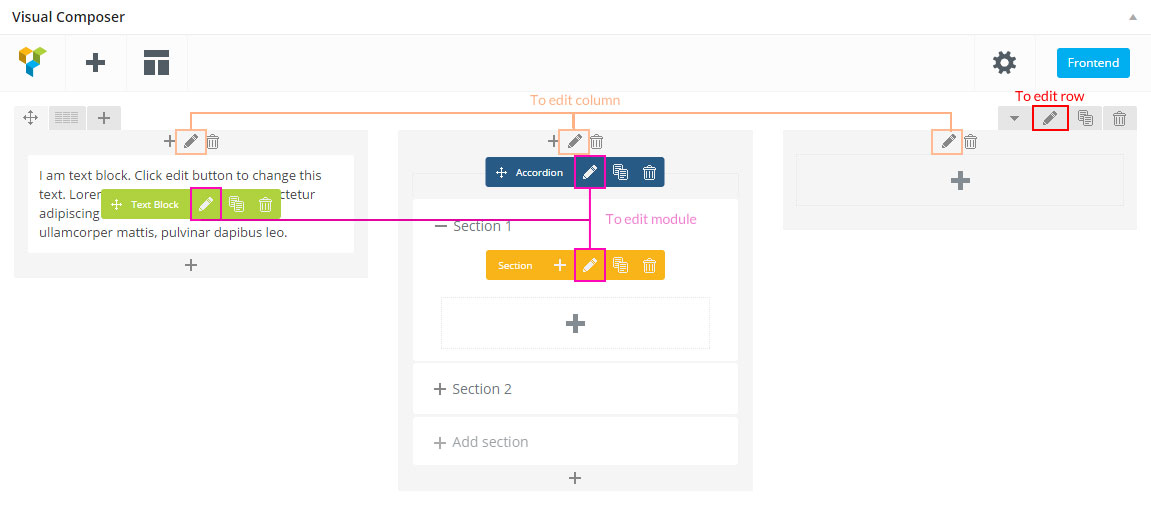
Duplicate Element
Pages Icon - To Duplicate Row or Module you need to click the Pages icon.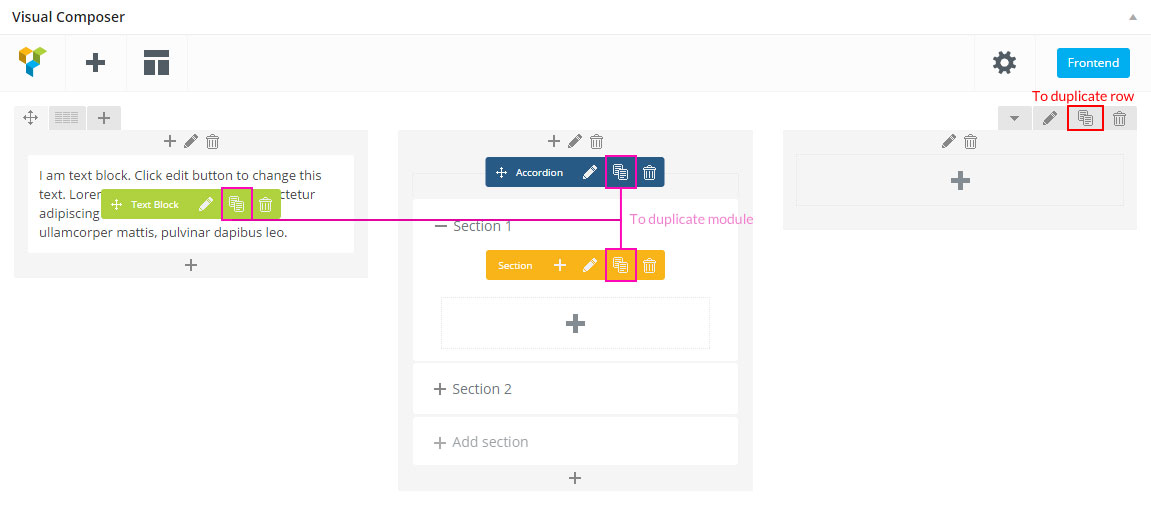
Remove Element
Trash Box Icon - To Remove Row, Column or Module you need to click the Trash Box icon.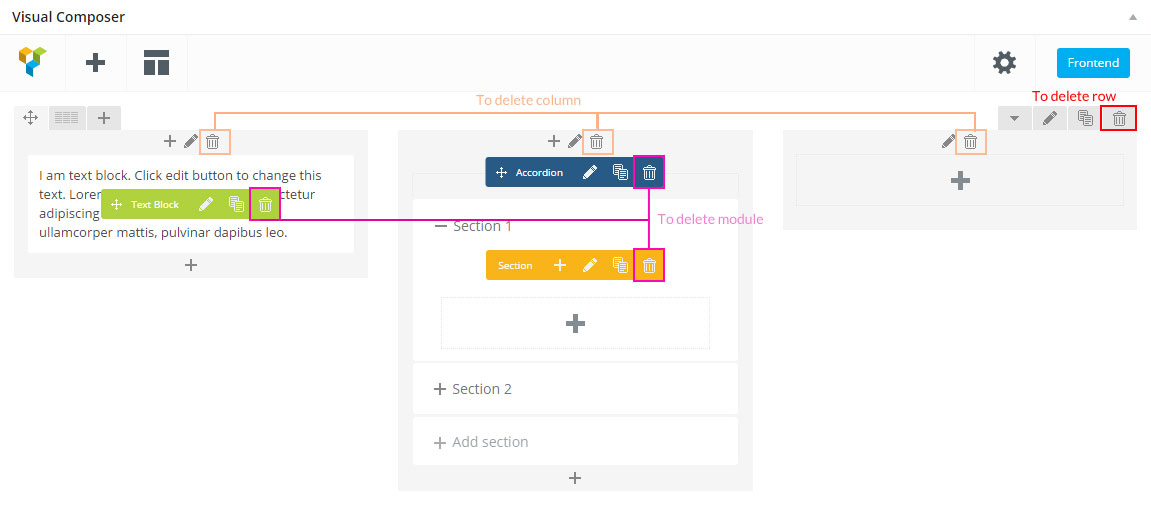
About Row / Column / Custom heading / Text Block Design options
Design Options - When you edit row / column / custom heading / text block module, you can edit the design options .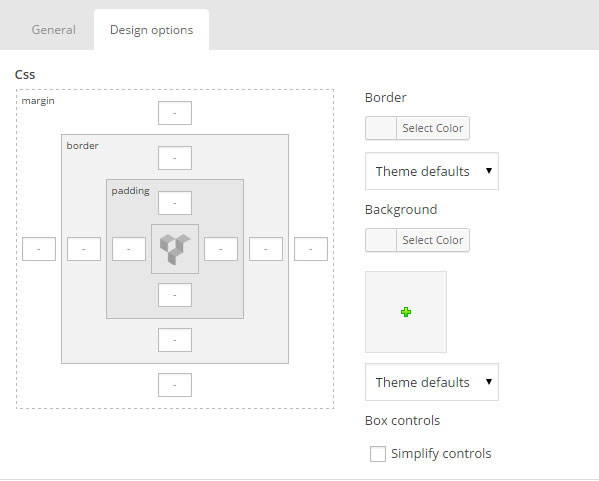 Row / Custom Heading / Text Block element have a default Bottom Margin of 35 pixel, you may want to set it to 0 if you don't want to have bottom space
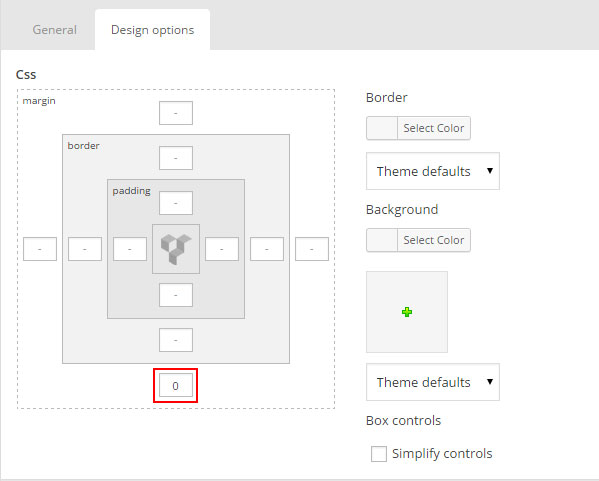 It is Good to add bottom Padding to your Column, so they will looks good on mobile
 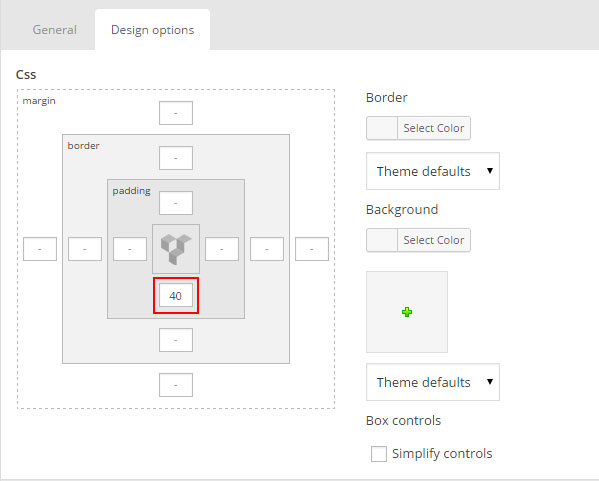 Left and Right Margin should NEVER be modified, please left blank
 For Row module the Left and Right Padding should also NEVER be modified, please left blank
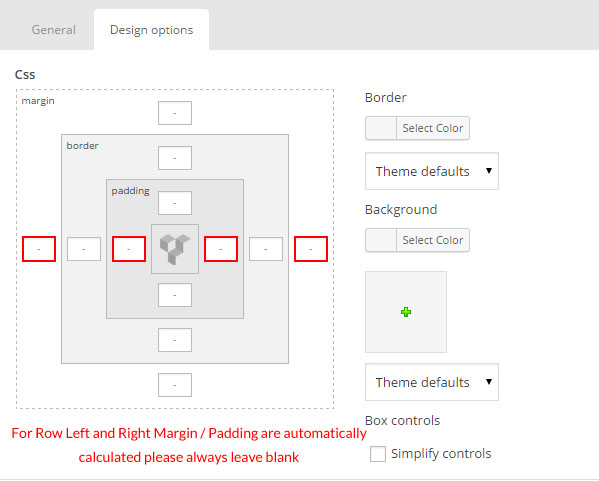
WooCommerce
bready themes is 100% compatible with the WooCommerce plugin for WordPress. It includes full design integration of the WooCommerce pages, shortcodes and widgets.
If you want to use Woocommerce you will have to install the plugin, to do so go to Plugins > Add New , search for Woocommerce.
The Plugin you need to install is WooCommerce - excelling eCommerce by WooThemes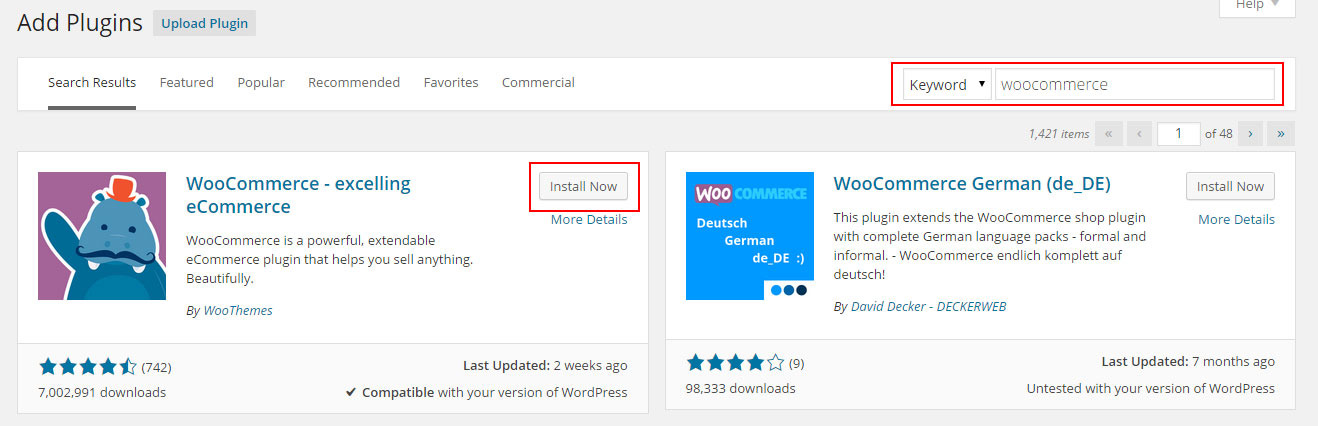
For full documentation visit the following websites:
- WooCommerce Plugin Page
- WooCommerce Documentation
- WooCommerce Community Forums
- WooCommerce Builtin Shortcodes
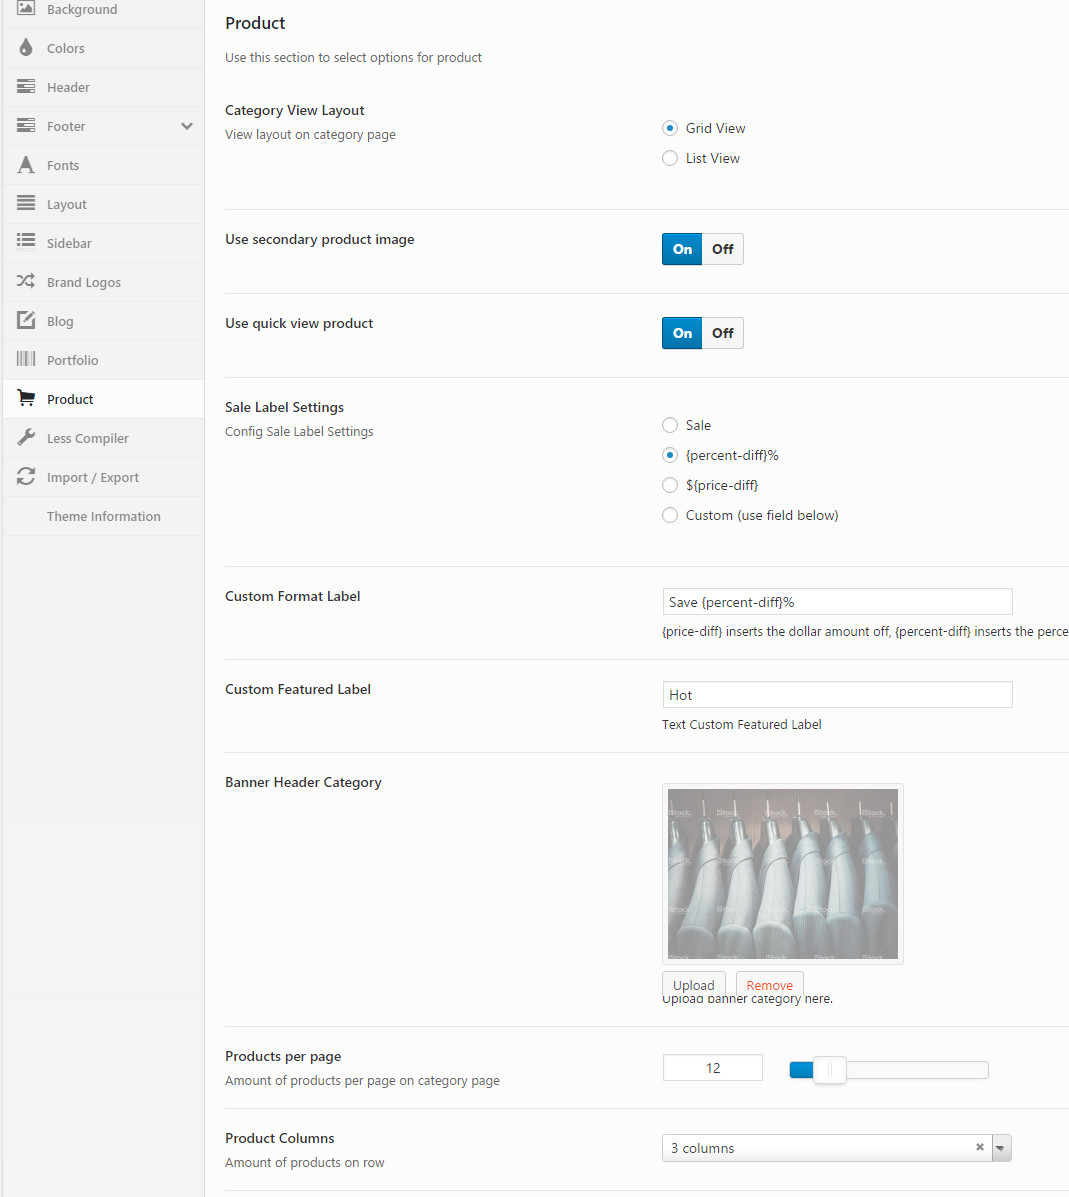
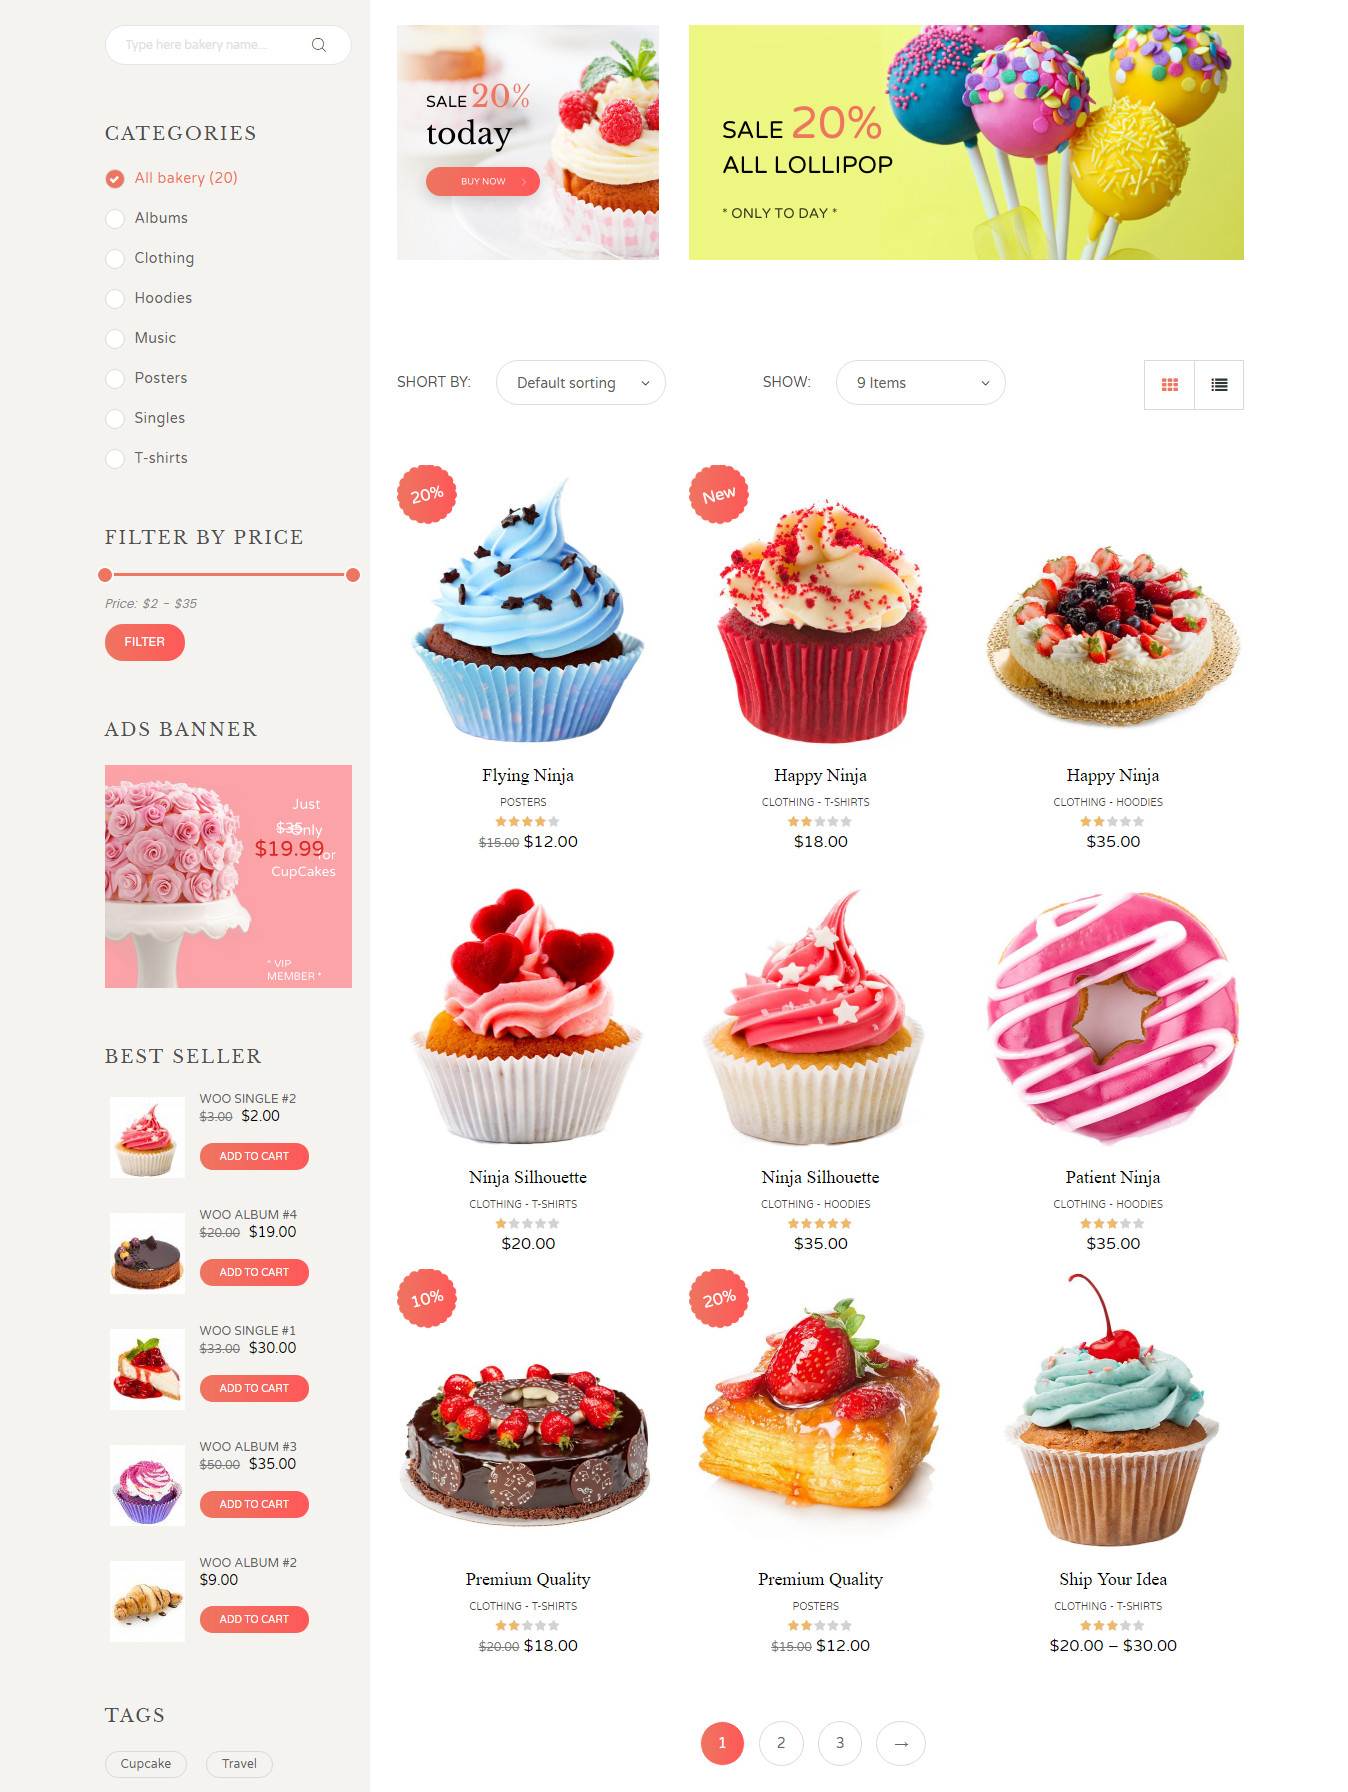
Category View Layout - View layout on category page: Grid View, List View
Use secondary product image - when the mouse hover in product
Use quick view product - Fast purchase without visiting the product detail page.
Sale Label Settings - include: sale, direct discount price, sale %, Custom (use field below)
Custom Format Label - {price-diff} inserts the dollar amount off, {percent-diff} inserts the percent reduction (rounded)..
Custom Featured Label - Text Custom Featured Label.
Products per page - Amount of products per page on category page.
Product Columns - Amount of products on row.
Create page with Revolution
Follow the next step to learn how to create a page with a revolution. First make sure you have already created a revolution
Page with Revolution
Step 1 - Go create or edit a page : Page > Add new.
Step 2 - Scroll down until you see the page options panel.
Step 3 - Change "Show title" to No ( optional )
Step 4 - Change "Page Slider" to Revolution .
Step 5 - Then Select the Revolution from the "Select revolution" field.
Step 6 - Select the "Slider Position" you can choose between Under the header or Above the header.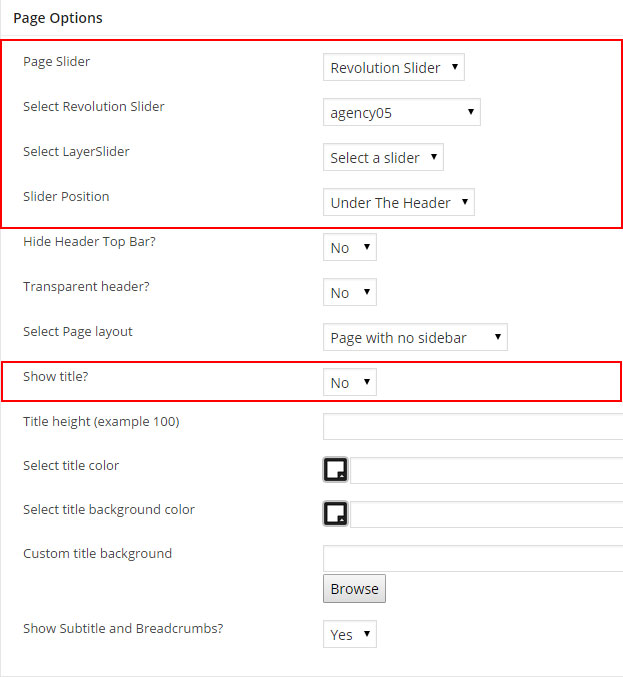
Step 7 - Update, publish your page.
Set your Homepage
Step 1 - Go to Settings > Reading in your WordPress Dasrdoard panel.
Step 2 - Set "Front page displays" to a "Static Page".
Step 3 - In the drop down menu for "Front Page" choose a page which will be your home page.
Step 4 - Leave the drop down menu for "Posts page" empty, as this is not used by the theme.
Step 5 - Save changes.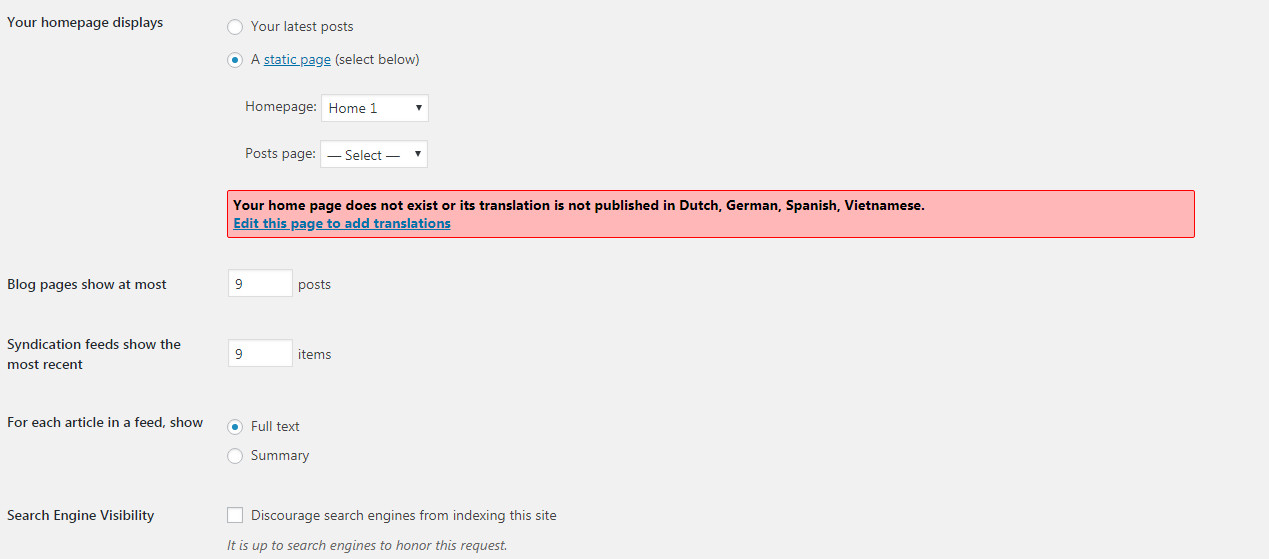
Create Google Maps
Full width Google Map
We will explain how to create a full width Google map section
Embed Google Map Block
We will explain how to create a embed google maps block
Full width Google Map
Step 1 - Go to your page / post, first activate the backend editor and click Add Element
Step 2 - Select the Google Maps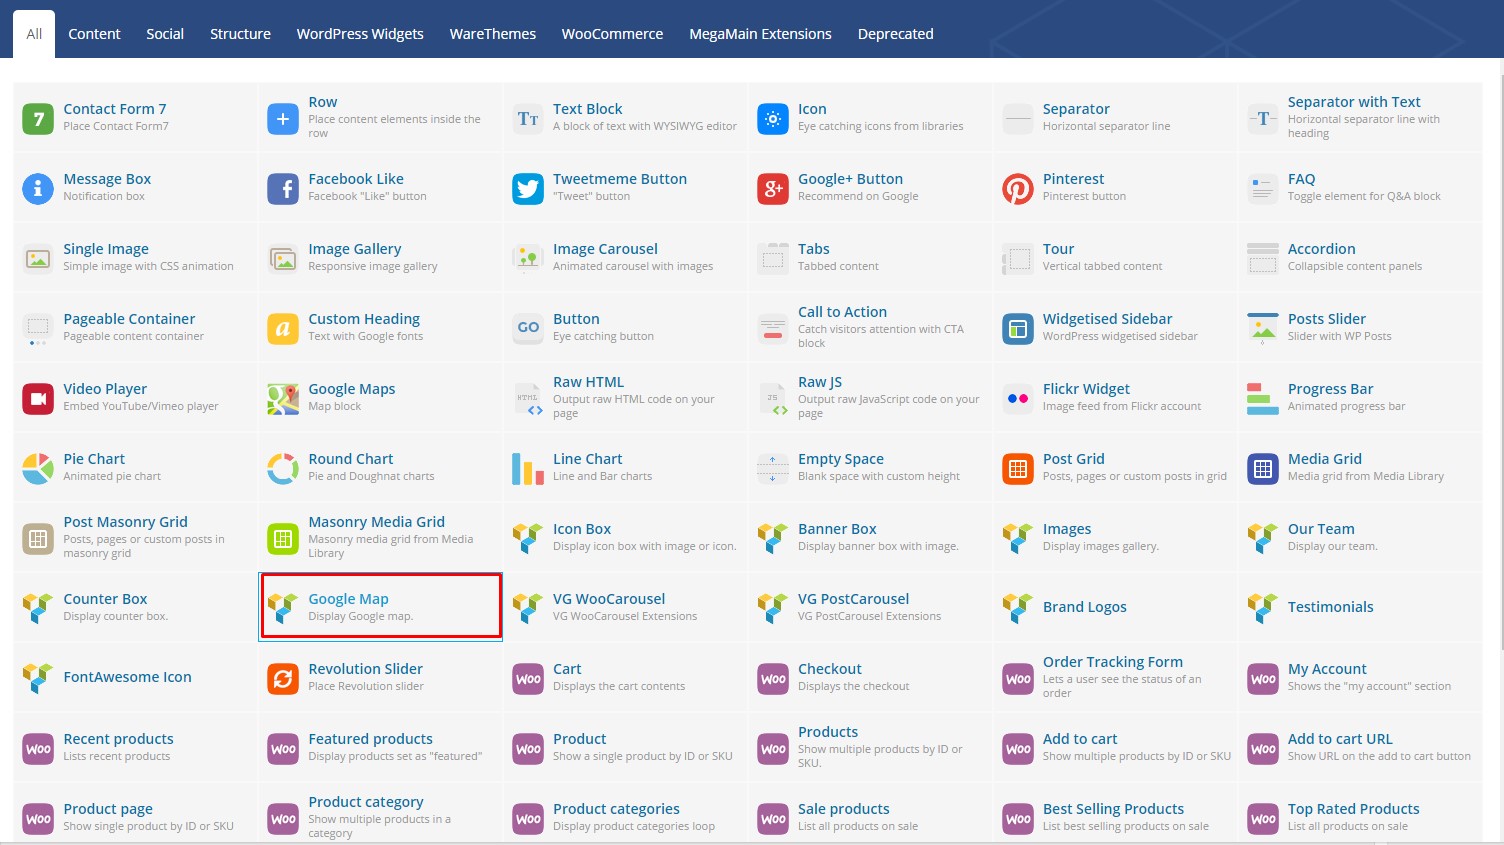
Step 3 - The Google Maps settings should open, you need to modify the Latitude and Longitude, you can also modify the height and zoom options 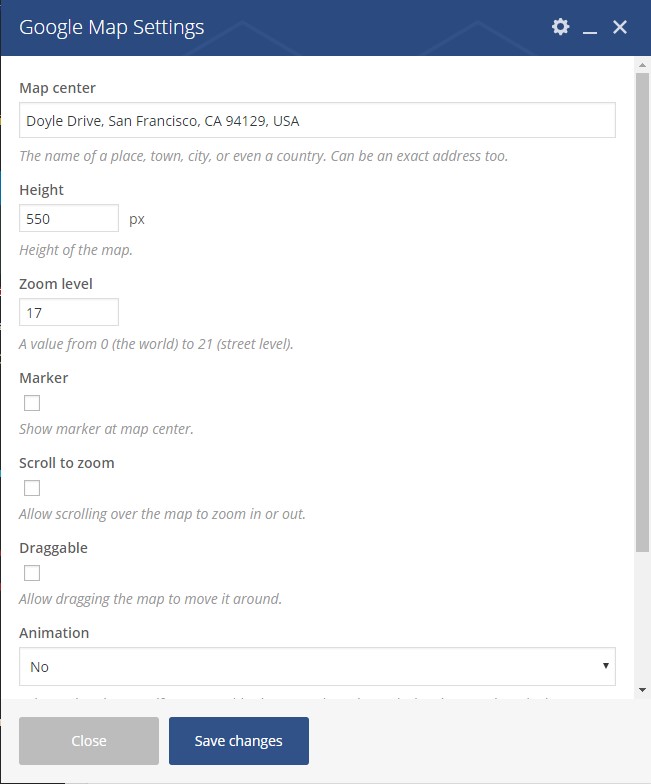
Change Font / Typography
Change Website Main Font / Typography
We will explain how to change the Website main font.
Change Header Menu Font / Typography
We will explain how to change the Website Header / Menu font.
Change Headings Font / Typography
We will explain how to change the Website Headings font.
Change Website Main Font / Typography
Step 1 - Log in your WordPress Admin click -->> Appearance -->> Customize -->> bready bready > Typography.
Step 2 - If you want to change the Main Font change Use Custom font for body to On. Then choose the font the font weight, font size and line-height. The Color is not set here, to change Color check the other Styling options Tab
Step 3 - Saves Changes
Change Header Menu Font / Typography
Step 1 - Log in your WordPress Admin click -->> Appearance -->> Customize -->> bready bready > Typography.
Step 2 - If you want to change the Header / Menu change Use Custom fonts for Menu / Header? to On. Then choose the font the font weight, font size and line-height. The Color is not set here, to change Header Color go to Header Styling options Tab to change Dropdown Color go to Dropdown Styling options Tab
Step 3 - Saves Changes
Change Headings Font / Typography
Step 1 - Log in your WordPress Admin click -->> Appearance -->> Customize -->> bready bready > Typography.
Step 2 - If you want to change the Headings change Use Custom fonts for Headings? to On. Then choose the font the font weight, font size and line-height. The Color is not set here, to change Color check the other Styling options Tab
Step 3 - Saves Changes
Child Theme
bready comes with a Child Theme.
Simply install wt-bready-child.zip like a regular WordPress theme.
What is a Child Theme?
A child theme is a theme that inherits the functionality of another theme, called the parent theme. Child themes allow you to modify, or add to the functionality of that parent theme. A child theme is the best, safest, and easiest way to modify an existing theme, whether you want to make a few tiny changes or extensive changes. Instead of modifying the theme files directly, you can create a child theme and override within.
Why use a Child Theme?
If you modify an existing theme and it is updated, your changes will be lost. With a child theme, you can update the parent theme (which might be important for security or functionality) and still keep your changes. It's a great way to get started if you are just learning WordPress theme development.
Additional Links
Theme Update via WordPress
Updating the theme via WordPress is very similar to the install process via WordPress.
Follow the steps below to update your theme via WordPress:
Step 1 - Log into your WordPress Dasrdoard.
Step 2 - Go to Appearance > Themes.
Step 3 - Deactivate the bready Theme by simply activating a different theme. Once you activate a different theme, you can delete the bready theme.
Step 4 - Delete the bready Theme. Do not worry, your content will not be lost!
Step 5 - Then simply upload the new "bready.zip" file in the Appearance > Themes section. Click on the Install Themes tab at the top and choose to upload the zip file. You have this step explained in section: Theme Installation via WordPress.
Theme Update via FTP
Updating the theme via FTP is very similar to the install process via FTP.
Follow the steps below to update your theme via FTP:
Step 1 - Go to .../wp-content > themes location on your server using a FTP client and backup your "bready" theme folder by saving it to your computer, or you can choose to simply delete it. Your content will not be lost.
Step 2 - Download the new version of bready theme from your Themeforest and retrieve bready folder by unpacking the zip that you download from Themeforest and bready_(version.number).zip.
Step 3 - Then simply drag and drop the new "bready" theme folder into .../wp-content > themes location. Choose to "Replace" the current one if you did not delete it.
Step 4 - Log into your WordPress Dasrdoard, go to Appearance > Themes and activate the new bready theme.
Speed Optimization
If you think your website takes too much time to load maybe you should.
- Install a Cache Plugin for WordPress. We recommend W3 Total Cache.
- Install an Image Compress Plugin. We recommend WP Smush It.
- Install a Database Optimizer Plugin We recommend WP Optimize
- Reduce the number of posts on the page
- Reduce the number of unnecessary plugins.
- Use more icons and less images.
Changelog
Version 1.00 (2018.08.10)
- First Release!